Skip to content
Avetti Support
Avetti Support

Getting Started

  • Getting Started Create a new Container store
  • Getting Started eShop
  • Getting Started Marketplace
  • Getting Started Multi Store Ecommerce
  • Getting Started With Accessibility
  • Getting Started With Website Performance
  • Getting Started With Google Analytics
  • Getting Started With Microsoft Clarity

Admin Pages

  • Create a New Supplier Store
  • Setup the Template/Default stores
  • Log in to a Supplier store
Dashboard
  • Dashboard
Catalog and Order Management
    Catalog
    • Product Dimensions
    • Sync Ecommerce
    • Find Products to Sell
    • Inventory
    • Prices
    • Manage Products
      • Products
      • Create Product
      • Edit Product
      • Edit Product Variations
    Orders
    • Quote Request
    • Chat
    • Return and Refunds
    • Click & Collect Orders
    • Manage Orders
About Me
  • General Information
  • Pickup Locations
  • Payment Information
Marketplace
  • Login Access Codes
  • Manage Standard Entities
  • Marketplace Category Mapping
  • Rebuild Marketplace
  • Category Profit Margin
  • Manage Supplier
  • Approve Supplier Data
  • Auction
Appendix
    Documentation Slides
    • About Me
    • Add Items – Suppliers
    • Create a Merchant Store
    • Customers
    • Manage Orders – Supplier
    • Prices – React Admin

System Admin Pages

  • Avetti Commerce Features
  • Ship Station Integration
B2C -Overview
    Templates
    • Catalog Personalization
    • Reset CDTO Cache
    • Template Skins
    People
    • Allowances
    • Customer Activity
    • Customer Properties
    • Customers
    • Member Types
    Marketing
    • A/B Split Tests
    • Add-ons
    • Basket Additions
    • Bundles
    • Coupons
    • Customer Discounts
    • Customer Segments
    • Customer Segment Prices
    • Customer Segment Ads
    • Gift Cards
    • Gift Certificates
    • Promotions
    • Sales Area Geolocation
    • Upsell/Cross-sell
    • Viral Promotions
    Settings
    • Basket Preferences
    • Image Scaling
    • Item Properties
    • Languages
    • Tax Rates
    • Order Preferences
    • Page Parameters
    • Payment Gateways
    • Retail Location
    • Search Dictionary
    • Shipping Countries
    • Shipping Packages
    • Shipping Rates
    • Sitemaps
    • Store Currencies
    • Shipping Exceptions
    • Store Preferences
    • Store Properties
    Audit Logs
    • Audit Log Views
    Catalog
    • Categories
    • Downloadable Items
    • Inventory
    • Item Reviews
    • Item Size/Weight
    • How to attach products to a category in the MCW
    • Manage Facets
    • Manage FAQs
    • Manage Galleries/PDFs
    • Manage Products
    • Multilingual Content
    • Prices
    • Validate Catalog Data
    • View Store
    • Variations
    Advanced
    • CDTO Editor
    • Change Password
    • Password Security Rules
    • Reports Configuration
    • Shopper Pwd Security
    • Site Admin Preferences
    • Solr Categories
    • Solr Items
    Media
    • Manage Media
    Orders
    • Abandon Cart
    • Customer Messages
    • Email State
    • Manage Orders
    • Manage Refunds
    • Reports
B2B - Overview
    Marketplace
      Advanced
      • Solr Items
      • Solr Categories
      • Site Admin Preferences
      • Shopper Pwd Security
      • Reports Configuration
      • Password Security Rules
      • Change Password
      • CDTO Editor
      Catalog
      • Item Status Settings
      • Item Options
      • Prices
      • Manage Facets
      • Item Size/Weight
      • Item Reviews
      • Inventory
      • Categories
      Marketing
      • Viral Promotions
      • Upsell/Cross-sell
      • Shipping Exceptions
      • Sales Area Geolocation
      • Marketing Segments
      • Gift Certificates
      • Gift Cards
      • Customer Segments
      • Customer Segment Prices
      • Customer Segment Ads
      • Customer Retargeting
      • Customer Discounts
      • Coupons
      • Bundles
      Market Place
      • Notifications
      • Master Catalog Products
      • Marketplace Suppliers
      • Marketplace Payments
      • Marketplace Categories
      • Category Profit Margin
      • Approve Products
      Media
      • Manage Media
      Order
      • Manage Refunds
      • Manage Orders
      People
      • Customers
      • Customer Properties
      Settings
      • Basket Preferences
      • Image Scaling
      • Item Properties
      • Order Preferences
      • Payment Gateways
      • Retail Location
      • Tax Rates
      • Store Preferences
      • Store Currencies
      • Shipping Countries
      Templates
      • Manage Templates
      • Reset CDTO Cache
      • Catalog Personalization
    Suppliers
      Catalog
      • Item Properties
      • Inventory
      • Manage Products
      Market Place
      • Approve Products
      • Marketplace Payments
      • Notifications
      Media
      • Manage Media
      Order
      • Customer Messages
      • Reports
      • Manage Refunds
      • Manage Orders
    MCW
      Advanced
      • Change Password
      Market Place
      • Notifications
      • Marketplace Suppliers
      • Approve Products
      Media
      • Manage Media
      Order
      • Customer Messages
      Settings
      • Store Preferences
      • Store Currencies
      • Shipping Countries
      • Item Properties
      Catalog
      • Categories
      • Inventory
      • Item Options
      • Item Reviews
      • Item Size/Weight
      • Item Status Settings
      • Prices
B2B2C - Overview
  • B2B Integration
Import and Export Files
  • Export Orders
  • Import Price and Inventory
  • Importing/Exporting Shipping Rates Spreadsheet
  • Import/Exporting SpreadSheets
  • eShop Features
Appendix
    Documentation Slides
      Others
      • Creating a Supplier Store
      • Rebuild solr
      • Publish
      People
      • Customer Data Management
      • Customers
      • Customer Properties
      Settings
      • Basket Preferences
      • Item Properties
      • MULTI-VALUED PROPERTIES
      • Retail Location
      • Shipping Countries
      • Sitemaps
      • Store Currency
      • STORE PREFERENCES
      • Store Properties
      • Tax Rates
      Advanced
      • Site Admin Preferences
      Reports
      • Business Reports
      Catalog
      • Advanced edit
      • Categories
      • Categories Spreadsheet
      • FREQUENTLY BOUGHT ITEMS
      • Import from XLS
      • Import-Export Advanced Spreadsheet
      • Inventory
      • Item Reviews
      • Manage Facets Manager
      • Simple Add
      • Prices
      • Validate Catalog Data
      • Variations
      Marketing
      • Bundles
      • Basket Additions
      • Coupons
      • Customer Discounts
      • Customer Segments
      • Gift Cards
      • Gift Certificate
      • Promotions
      • Upsell-Cross sell
      Marketplace
      • Approve Products
      Templates
      • Reset CTDO Cache
      Orders
      • Customer Messages
      • Export Orders
      • Email Settings
      • Manage Orders
      • SMS Settings
    Documentation Videos
    • Payment Gateway
    • Retail Location
    • Validate Catalog Data
    • Site Admin Preferences
    • SMS Settings
    • Advanced Edit
    • Variations
    • Manage Orders
    • Categories
    • Basket Preferences
    • Customers
    • Upsell Cross Sell
    • Allowances
    • Customer Discounts
    • Order Preferences
    • Publish
    • Rebuild Solr
    • Email Setting
    • Store Preferences
    • Item Reviews
    • Tax Rates
    • Customer Segments
    • Store Currency
    • Product Data Spreadsheet
    • Export Orders
    • Sitemaps
    • Prices
    • Coupons
    • Bundles
    • Frequently Bought Items
    • Customer Properties
    • Store Properties
    • Multi Valued Properties
    • Gift Cards
    • Promotions
    • Manage Media
    • Gift Certificates
    • Manage Facets
    • Simple Add
    • Import and Export Using Spreadsheet
    • Customer Messages
    • Creating a Supplier Store
    • Approve Products
    • Import XLS
    • Business Reports
    • Item Properties

WordPress

  • Getting Started
  • Document Checklist
  • How to create pages in Wordpress?
  • How to create New Menus?
  • How to edit the Home Page?
  • How to change Favicon and Site Title?
  • How to edit Header and Footer?
  • How to change Header and Footer?
  • How to edit Shipping Policy, Refund Policy and Privacy Policy pages?
  • How to add Google Analytics and Microsoft Clarity
  • Using Existing WP vs Using Fresh WP
  • How to change Logo URL
  • How to create Blog Posts?
  • Blog Look And Layout
  • Netlify Redirects
  • Caching Issues
  • Plugins
Plugins
  • Fluent Forms
  • Perfmatters
  • Blocksy
  • Change SEO Title and Meta Descriptions with Yoast SEO
  • Staging and Backup with WPVivid
  • Stackable
  • Custom Javascript and CSS plugin
Common Issues
  • Does Not Use Passive Listeners
  • Enable Text Compression
  • Preload Largest Content Paint Image
  • Home
  • Docs
  • WordPress
  • Plugins
  • Staging and Backup with WPVivid

Staging and Backup with WPVivid

Table of Contents
  • Staging
    • How to push changes from Staging site to Live site?

WPVivid is a WordPress plugin that allows users to create and manage backups of their WordPress website. With WPVivid, users can schedule automatic backups, restore their website from a backup, and migrate their website to a new domain or host. The plugin also provides options for storing backups on remote locations, such as Amazon S3 or Google Drive. WPVivid is designed to make it easy for users to keep their website safe and secure by providing an easy-to-use tool for creating and managing backups.

Install the WPVivid plugin on your WordPress website by going to the “Plugins” menu in your WordPress dashboard, clicking “Add New”, and searching for “WPVivid”. Click “Install” and then “Activate” to complete the installation process.

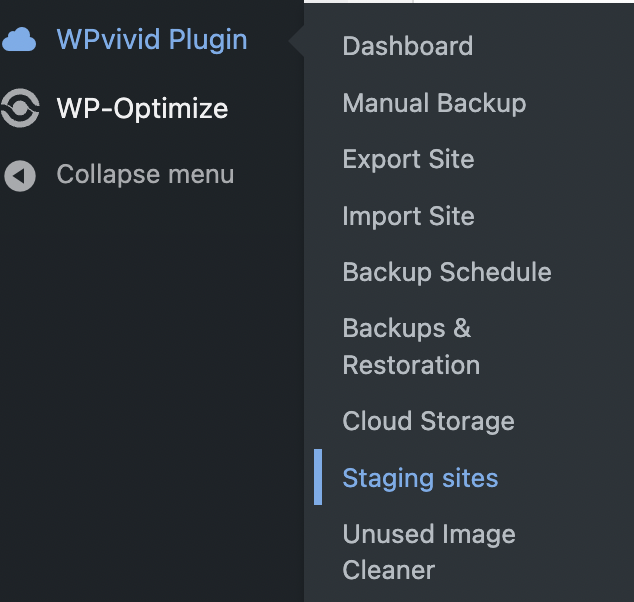
Once the plugin is activated, you will see a new menu item called “WPVivid” in your WordPress dashboard. Click on this menu to access the WPVivid dashboard.

From the WPVivid dashboard, you can create a new backup of your website by clicking the “Backup Now” button. This will initiate a backup process, and you can monitor the progress of the backup in the “Backup Status” section of the dashboard.

You can also schedule automatic backups by clicking the “Schedule” tab in the WPVivid dashboard. From here, you can specify how often you want the plugin to create backups and choose which parts of your website you want to include in the backup (e.g., database, files, etc.).

If you need to restore your website from a backup, go to the “Restore” tab in the WPVivid dashboard and select the backup you want to restore. Click the “Restore” button to initiate the restoration process.

If you want to migrate your website to a new domain or host, go to the “Migrate” tab in the WPVivid dashboard and enter the details of your new site. Click the “Migrate” button to begin the migration process.

Staging #

WPvivid Staging has 3 tab pages: Staging Sites, Create A Staging Site, Create A Fresh WP Install

The Staging Sites page serves as a managing dashboard for all your staging sites. From the page, you can copy a staging site to live, update a staging site and delete a staging site. It also gives you quick access to the creating page of the staging site and fresh WP install.

From the page, you can create a staging site in a subdirectory of the current site in few steps:

  1. Choose a database to install the staging site: to the same database as your live site, or a separate database.
  2. Choose directory to install the staging site: the root directory or the wp-content directory.
  3. Choose what to copy to the staging site: Select files and database tables you want to copy from live site to the staging site

Once you’re done with the settings, click ‘Create Now’ to start creating the staging site.

The ‘fresh WP install’ page allows you to create a fresh WordPress install in a subdirectory of the current site in few steps:

  1. Choose a database to install the fresh install: to the same database as your live site, or a separate database.
  2. Choose directory to install the fresh install: the root directory or the wp-content directory.
  3. Choose what to copy to the fresh install: Select files and database tables you want to copy from live site to the fresh install.

Once you’re done with the settings, click ‘Create Now’ to start creating the the fresh install.

How to push changes from Staging site to Live site? #

To push the change go to WpVivid Menu on the Dashboard and click Staging:

To push a staging site to live, click on Copy the Staging Site to Live button on the Staging Sites tab,

Next, select the content you want to copy from the staging site to the live site,

  • Database + Uploads folder: When you choose this option, only the database and the Uploads folder of the staging site will be pushed to the live site.
  • Custom Content: Select content you wish to push to the live site, click the arrows to expand the options.

Once you have selected the content, hit the Copy Now button to start publishing it to the live site.

Note: Please do not close or refresh the page while the plugin is copying a staging site to a live site. This can take some time depending on your connection speed and the size of the copy.

Once done, a success message will pop up.

That’s it! With WPVivid, you now have a powerful tool for creating and managing backups of your WordPress website.

What are your Feelings
Still stuck? How can we help?

How can we help?

Updated on January 5, 2023
Change SEO Title and Meta Descriptions with Yoast SEOStackable

Powered by BetterDocs

Table of Contents
  • Staging
    • How to push changes from Staging site to Live site?

Copyright © 2022 Avetti.com Corporation.