
Overview #
This document provides an administrator an overview on the catalog personalization process to add a New Content Group and edit it. The catalog personalization feature is used to insert sub templates into a specific page of the store based on pre-defined rules.
For example, a rule can define that if the item page for item code ITEM1234 is accessed, then a sub template will be inserted in the item template to display extra content.
Catalog Personalization #
- Click Templates.
- Click Catalog Personalization.
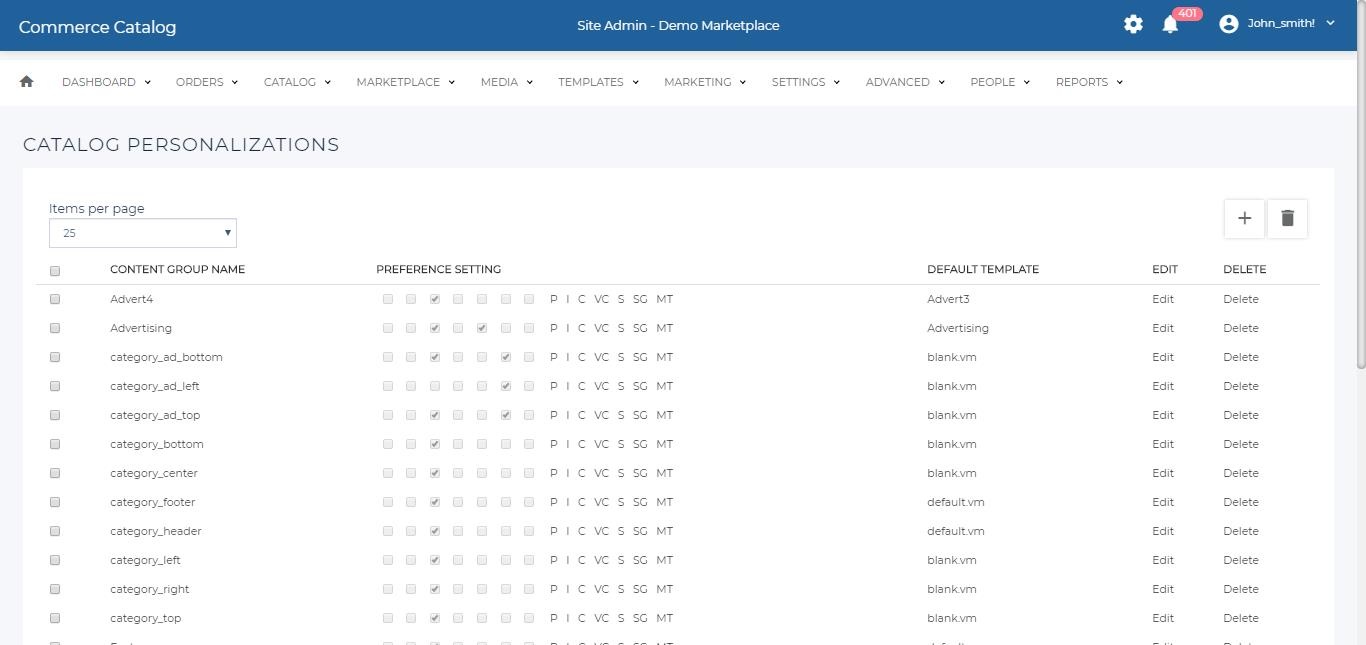
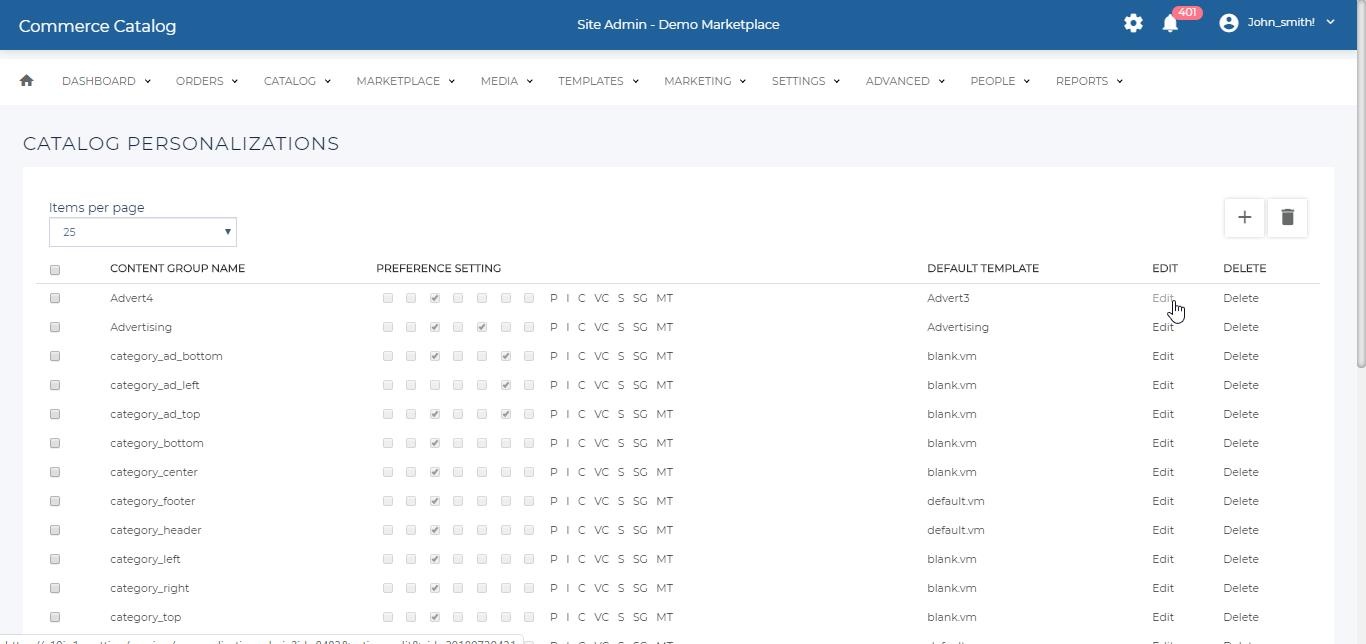
| Heading | Description |
|---|---|
| Content Group Name | The name of the content group. This is how the content group will be searched and must be a unique identifier to any other content group. |
| Preference Setting | Is the settings set in the content group, the settings can also be changed. P = Promotion, I = Item, C = Category, VC = Virtual Category, S = Shopper, SG = Shopper group, MT = Member Type.Each setting will be detailed in the Adding a new content group section of this document. |
| Default Template | Is the default template selected. This template is displayed if no rules for the content group match. |
| Edit | Display the edit link giving the ability to edit any content group. |
| Delete | The delete link is a single delete that deletes the content group of the row the delete link was clicked. |
| Options | Description |
|---|---|
| Add | Redirects to the Add Personlization Information page |
| Back | Redirects back to the dashboard page |
| Delete | Select multiple content groups by checking the check-boxes and delete all content groups selected. |
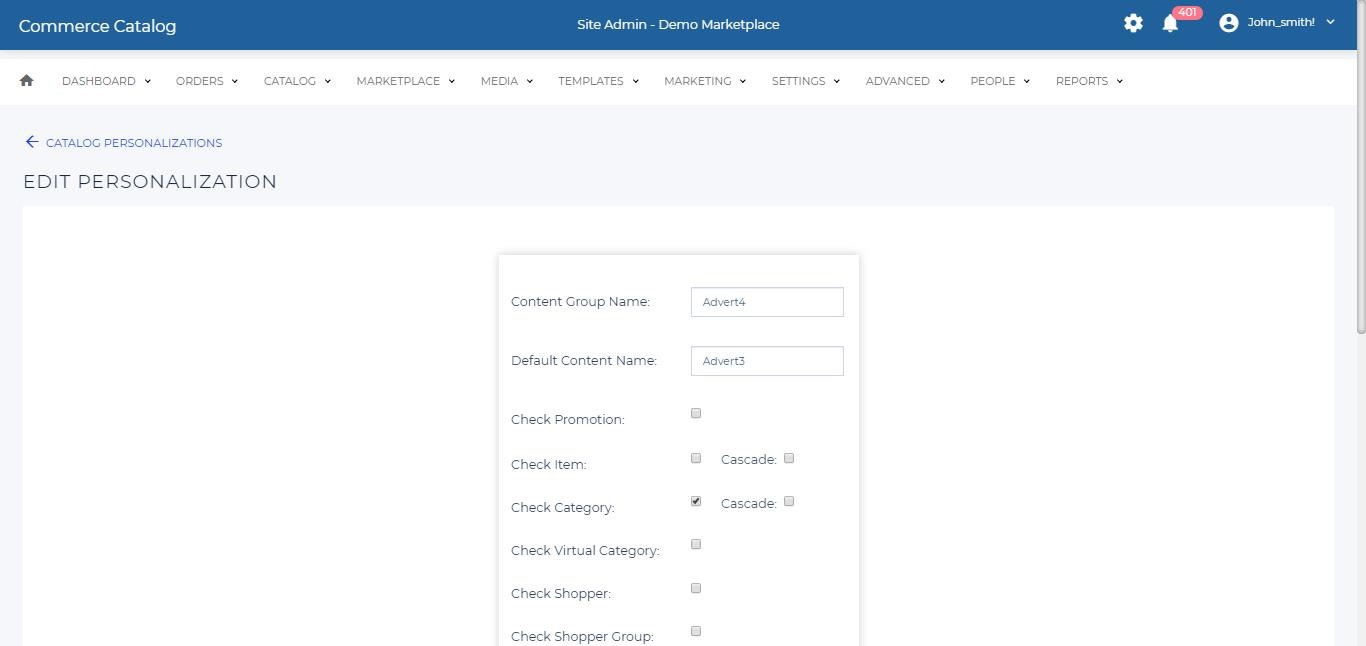
Adding a new content group #
- Click on add to add new content group.
- Enter the details (Refer table 3).
- Click Update and Ok to save the details.
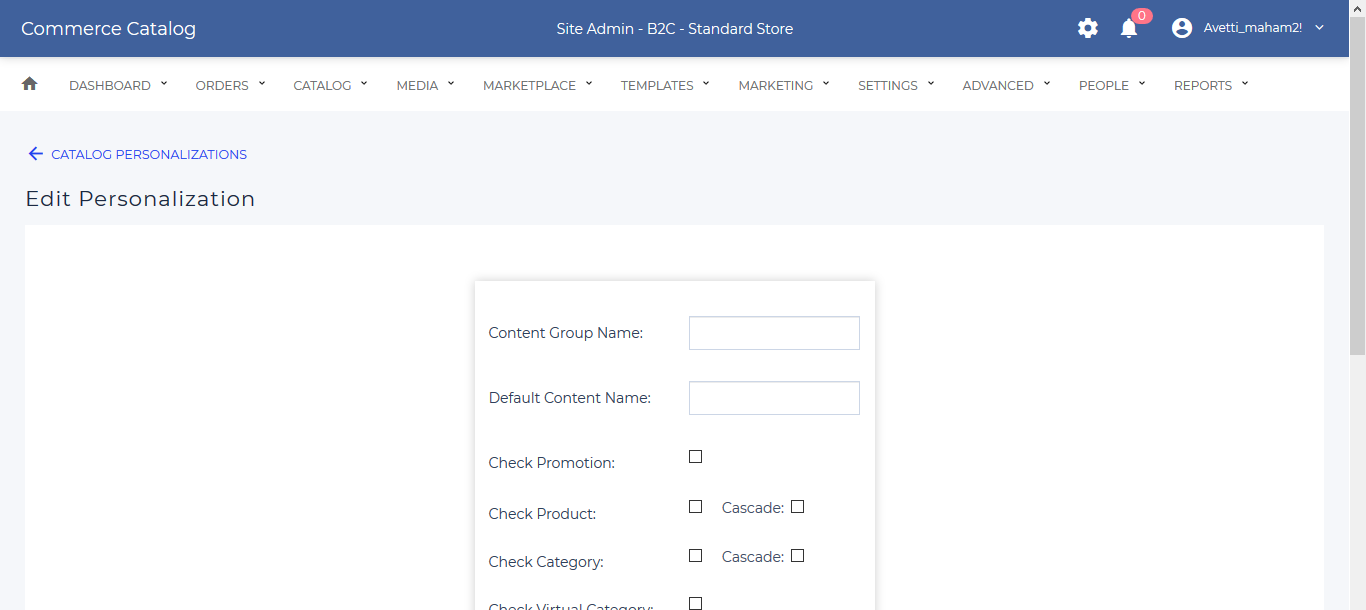
| Fields | Description |
|---|---|
| Content Group Name | Name of the content |
| Default Content Name | Name of the default template |
| Check Promotion | If marking this check box, the content of the group will be displayed on the catalog page according to Promotion Code which will be set for the particular content of this group. |
| Check Item | Checking this check box, the content of the group will be displayed on the catalog page according to Item Code which will be set for the particular content of this group. |
| Check Category | If marking this check box, the content of the group will be displayed on the catalog page according to Category Name which will be set for the particular content of this group. |
| Check Shopper | If marking this check box, the content of the group will be displayed on the catalog page according to the Shopper Log in Name which will be set for the particular content of this group. |
| Check Shopper Group | If marking this check box, the content of the group will be displayed on the catalog page according to Shopper Group Name which will be set for the particular content of this group. |
| Check Member Type | If marking this check box, the content of the group will be displayed on the catalog page according to Member Type which will be set for the particular content of this group. |
| Template Size | Size of template (For any size, use the words “Any Size”.) |
Edit #
- Click on the Edit link corresponding to either just added group or a previously created one.
- Enter the details (Refer table 3)
- Click on Save or Update button to save the changes.
Delete #

To delete a single content group just click the Delete beside the content group.
To delete multiple content groups select all of the content groups to delete by checking the check-boxes beside the content groups and then click the Delete button.
Note
Anything deleted here will not be obtainable once the content group is deleted and there will be no warning message when deleting content group
Personalization Detail #
It connects the content group to a select type either, category, item code, shopper, shopper group etc.
Add Personalization Detail #
- Select a content group.
- Click the Edit link.
- If no detail is added the bottom of the page will say “Nothing found to display”. Click the Add button to add a new Personalization Detail.
- Click the Update or Ok button to process the Personalization Detail.
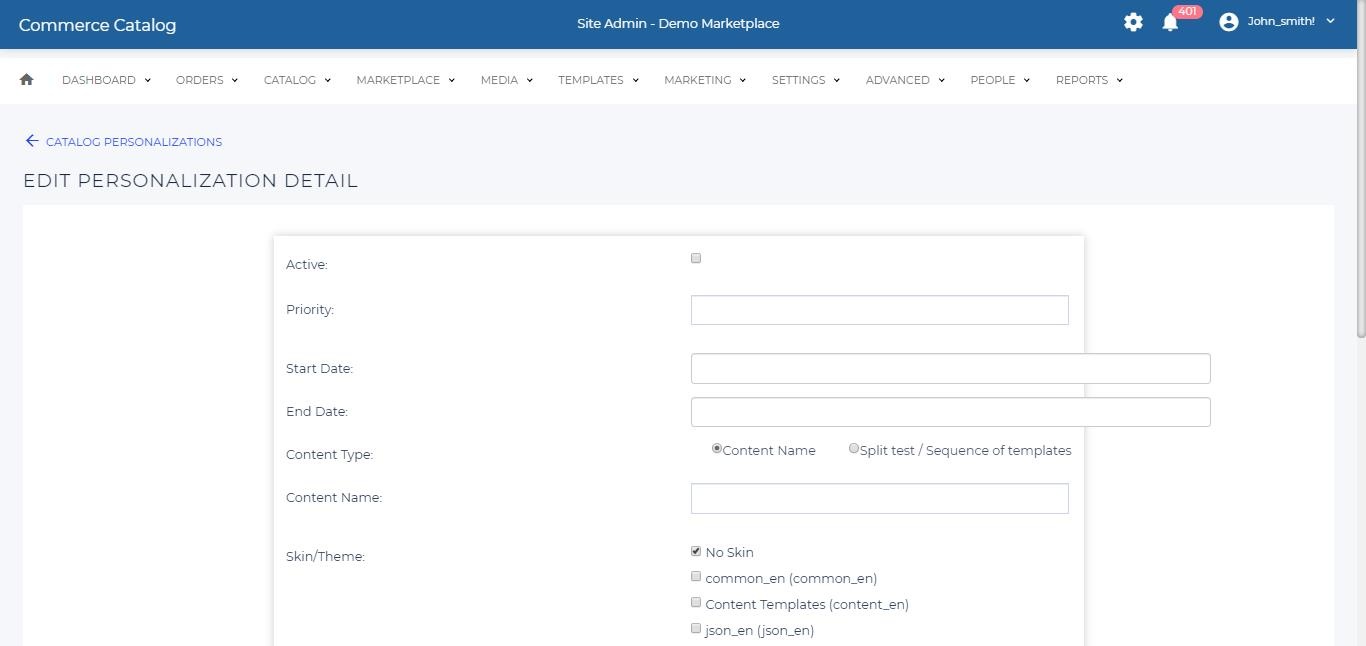
| Field | Description |
|---|---|
| Active | If the personlization detail is active or not. If not active, the rules set here will never be triggered. |
| Priority | The priority the personlization detail has over other personlization details that contain the same category, item code, etc as the one with the highest priority will be used. |
| Start Date | The date the personalization detail will be active if both the start date and the personlization detail is active |
| End Date | The last date the personalization detail will be active. |
| Content Name | The sub-template to be rendered in the catalog pages if all requirements are met with the content group. |
| Skin/Theme | The skin the personalization detail will be based off. |
| Field | Description |
|---|---|
| Promotion Code | Use the drop down to select a promotion code that will contain this content group. |
| Item Code | Enter the item code of the item that will display this content group. |
| Category Name | Use the drop down to select a category that will display this content group. |
| Shopper Login Name | The shopper login name of the user to which this content group will be displayed. |
| Shopper Group Name | Use the drop down to select a shopper group to which this content group will be displayed. |
| Member Type | Use this drop down to select a member type to which this content group will be displayed.Only a single type can be selected for each row, to add more types create more personalization details. |
| Heading | Description |
|---|---|
| Active | Shows if the personalization detail is active. |
| Priority | The priority of the personalization detail. |
| Start Date | The start date of the personalization detail. |
| End Date | The end date of the personalization detail. |
| Content Name | The content name based on the content group name. |
| Category Name | The category that contains the personalization detail. |
| Shopper Login Name | The login name of the shopper to which the personalization detail will be displayed. |
| Edit | Allows the personalization detail to be modified by clicking the Edit link.For more information on this, go to the Edit Personalization Detail section of this document. |
| Delete | Allows for the personalization detail to be delete by clicking the Delete link beside the personalization detail to delete. |
Edit Personalization Detail #
- Click the Edit link beside the personalization detail to modify it. Refer Add personalization detail section of this page.
- The skin can not be modified here.
Delete Personalization Detail #
- Click the Delete link beside the personalization detail to delete a personalization detail.
- Check the checkbox beside the each personalization detail to delete mutiple personalization details and click the Delete button to delete selected personalization details.
Creating a DTO #
Once a new content group has been created containing rules (personalization details) to render specific sub-templates, a DTO (Data Transfer Objects) must be created in order to validate the rules.
- Set the content of the DTO (Refer table 7).
- Once the DTO has been created, it has to be attached and parsed into the template that will render the content.
| Field | Description |
|---|---|
| Name | Name the DTO after the content group to be rendered. For example: a content group named group_a_info should have the DTO named group_a_infoDTO. This is not mandatory but makes it easier to relate to which template the DTO refers to. |
| Query | This document will not get into technical details as how DTOs work. To use this functionality, use the following query:”%%DTOnameDTO%%:template_name”. For example, if you have a personalization content group named “test1″, the content of DTO should be”%%test1DTO%%:test1”. and if you have another personalization group named “promotion”, which you want to add to the same dto, the content of DTO should be”%%test1DTO%%:test1, promotion”. |
| DTO Type | Select Personalization DTO |