Skip to content
Avetti Support
Avetti Support
Popular Search seller ratingbasket additionspromotionsmanage fabid

Getting Started

  • Getting Started Create a new Container store
  • Getting Started eShop
  • Getting Started Marketplace
  • Getting Started Multi Store Ecommerce
  • Getting Started With Accessibility
  • Getting Started With Website Performance
  • Getting Started With Google Analytics
  • Getting Started With Microsoft Clarity

Admin Pages

  • Create a New Supplier Store
  • Setup the Template/Default stores
  • Log in to a Supplier store
Avetti Shop Connect
  • Shopify 
  • Magento
  • WooCommerce
Catalog and Order Management
    Catalog
    • Find Products to Sell
    • Prices
    • Manage Products
      • Products
      • Create Product
      • Edit Product
      • Edit Product Variations
    Orders
    • Quote Request
    • Manage Orders
About Me
  • General Information
  • Pickup Locations
  • Payment Information
Marketplace
  • Auction
Appendix
    Documentation Slides
    • About Me
    • Add Items – Suppliers
    • Create a Merchant Store
    • Customers
    • Manage Orders – Supplier
    • Prices – React Admin
Avetti Supplier Connect
  • Shopify

WordPress

  • Getting Started
  • Document Checklist
  • How to create pages in Wordpress?
  • How to create New Menus?
  • How to edit the Home Page?
  • How to change Favicon and Site Title?
  • How to edit Header and Footer?
  • How to change Header and Footer?
  • How to edit Shipping Policy, Refund Policy and Privacy Policy pages?
  • How to add Google Analytics and Microsoft Clarity
  • Using Existing WP vs Using Fresh WP
  • How to change Logo URL
  • How to create Blog Posts?
  • Blog Look And Layout
  • Netlify Redirects
  • Caching Issues
  • Plugins
Plugins
  • Fluent Forms
  • Perfmatters
  • Blocksy
  • Change SEO Title and Meta Descriptions with Yoast SEO
  • Staging and Backup with WPVivid
  • Stackable
  • Custom Javascript and CSS plugin
Common Issues
  • Does Not Use Passive Listeners
  • Enable Text Compression
  • Preload Largest Content Paint Image

System Admin Pages

  • Avetti Commerce Features
  • Ship Station Integration
B2C -Overview
    Settings
    • Basket Preferences
    • Image Scaling
    • Item Properties
    • Languages
    • Tax Rates
    • Order Preferences
    • Page Parameters
    • Payment Gateways
    • Retail Location
    • Search Dictionary
    • Shipping Countries
    • Shipping Packages
    • Shipping Rates
    • Sitemaps
    • Store Currencies
    • Shipping Exceptions
    • Store Preferences
    • Store Properties
    Advanced
    • CDTO Editor
    • Change Password
    • Password Security Rules
    • Reports Configuration
    • Shopper Pwd Security
    • Site Admin Preferences
    • Solr Categories
    • Solr Items
    Audit Logs
    • Audit Log Views
    Templates
    • Catalog Personalization
    • Reset CDTO Cache
    • Template Skins
    People
    • Allowances
    • Customer Activity
    • Customer Properties
    • Customers
    • Member Types
    Catalog
    • Categories
    • Downloadable Items
    • Inventory
    • Item Reviews
    • Item Size/Weight
    • How to attach products to a category in the MCW
    • Manage Facets
    • Manage FAQs
    • Manage Galleries/PDFs
    • Manage Products
    • Multilingual Content
    • Prices
    • Validate Catalog Data
    • View Store
    • Variations
    Media
    • Manage Media
    Marketing
    • A/B Split Tests
    • Add-ons
    • Basket Additions
    • Bundles
    • Coupons
    • Customer Discounts
    • Customer Segments
    • Customer Segment Prices
    • Customer Segment Ads
    • Gift Cards
    • Gift Certificates
    • Promotions
    • Sales Area Geolocation
    • Upsell/Cross-sell
    • Viral Promotions
    Orders
    • Abandon Cart
    • Customer Messages
    • Email State
    • Manage Orders
    • Manage Refunds
    • Reports
B2B - Overview
    Marketplace
      Advanced
      • Solr Items
      • Solr Categories
      • Site Admin Preferences
      • Shopper Pwd Security
      • Reports Configuration
      • Password Security Rules
      • Change Password
      • CDTO Editor
      Catalog
      • Item Status Settings
      • Item Options
      • Prices
      • Manage Facets
      • Item Size/Weight
      • Item Reviews
      • Inventory
      • Categories
      Marketing
      • Viral Promotions
      • Upsell/Cross-sell
      • Shipping Exceptions
      • Sales Area Geolocation
      • Marketing Segments
      • Gift Certificates
      • Gift Cards
      • Customer Segments
      • Customer Segment Prices
      • Customer Segment Ads
      • Customer Retargeting
      • Customer Discounts
      • Coupons
      • Bundles
      Market Place
      • Notifications
      • Master Catalog Products
      • Marketplace Suppliers
      • Marketplace Payments
      • Marketplace Categories
      • Category Profit Margin
      • Approve Products
      Media
      • Manage Media
      Order
      • Manage Refunds
      • Manage Orders
      People
      • Customers
      • Customer Properties
      Settings
      • Basket Preferences
      • Image Scaling
      • Item Properties
      • Order Preferences
      • Payment Gateways
      • Retail Location
      • Tax Rates
      • Store Preferences
      • Store Currencies
      • Shipping Countries
      Templates
      • Manage Templates
      • Reset CDTO Cache
      • Catalog Personalization
    Suppliers
      Catalog
      • Item Properties
      • Inventory
      • Manage Products
      Market Place
      • Approve Products
      • Marketplace Payments
      • Notifications
      Media
      • Manage Media
      Order
      • Customer Messages
      • Reports
      • Manage Refunds
      • Manage Orders
    MCW
      Advanced
      • Change Password
      Market Place
      • Notifications
      • Marketplace Suppliers
      • Approve Products
      Media
      • Manage Media
      Order
      • Customer Messages
      Settings
      • Store Preferences
      • Store Currencies
      • Shipping Countries
      • Item Properties
      Catalog
      • Categories
      • Inventory
      • Item Options
      • Item Reviews
      • Item Size/Weight
      • Item Status Settings
      • Prices
B2B2C - Overview
  • B2B Integration
Import and Export Files
  • Export Orders
  • Import Price and Inventory
  • Importing/Exporting Shipping Rates Spreadsheet
  • Import/Exporting SpreadSheets
  • eShop Features
Appendix
    Documentation Slides
      Others
      • Creating a Supplier Store
      • Rebuild solr
      • Publish
      People
      • Customer Data Management
      • Customers
      • Customer Properties
      Settings
      • Basket Preferences
      • Item Properties
      • MULTI-VALUED PROPERTIES
      • Retail Location
      • Shipping Countries
      • Sitemaps
      • Store Currency
      • STORE PREFERENCES
      • Store Properties
      • Tax Rates
      Advanced
      • Site Admin Preferences
      Reports
      • Business Reports
      Catalog
      • Advanced edit
      • Categories
      • Categories Spreadsheet
      • FREQUENTLY BOUGHT ITEMS
      • Import from XLS
      • Import-Export Advanced Spreadsheet
      • Inventory
      • Item Reviews
      • Manage Facets Manager
      • Simple Add
      • Prices
      • Validate Catalog Data
      • Variations
      Marketing
      • Bundles
      • Basket Additions
      • Coupons
      • Customer Discounts
      • Customer Segments
      • Gift Cards
      • Gift Certificate
      • Promotions
      • Upsell-Cross sell
      Marketplace
      • Approve Products
      Templates
      • Reset CTDO Cache
      Orders
      • Customer Messages
      • Export Orders
      • Email Settings
      • Manage Orders
      • SMS Settings
    Documentation Videos
    • Payment Gateway
    • Retail Location
    • Validate Catalog Data
    • Site Admin Preferences
    • SMS Settings
    • Advanced Edit
    • Variations
    • Manage Orders
    • Categories
    • Basket Preferences
    • Customers
    • Upsell Cross Sell
    • Allowances
    • Customer Discounts
    • Order Preferences
    • Publish
    • Rebuild Solr
    • Email Setting
    • Store Preferences
    • Item Reviews
    • Tax Rates
    • Customer Segments
    • Store Currency
    • Product Data Spreadsheet
    • Export Orders
    • Sitemaps
    • Prices
    • Coupons
    • Bundles
    • Frequently Bought Items
    • Customer Properties
    • Store Properties
    • Multi Valued Properties
    • Gift Cards
    • Promotions
    • Manage Media
    • Gift Certificates
    • Manage Facets
    • Simple Add
    • Import and Export Using Spreadsheet
    • Customer Messages
    • Creating a Supplier Store
    • Approve Products
    • Import XLS
    • Business Reports
    • Item Properties
  • Home
  • Docs
  • WordPress
  • Plugins
  • Fluent Forms

Fluent Forms

Table of Contents
  • Creating a New Form
  • Adding a Form to a WordPress Page
  • Entries

Fluent Forms is a popular WordPress plugin that allows website owners to create and manage customizable forms for their WordPress websites. With Fluent Forms, you can easily create forms for various purposes, including contact forms, lead generation forms, registration forms, surveys, polls, and more.

The plugin offers a drag-and-drop form builder that allows you to create custom forms with ease, and you can customize the forms to match your website’s design and branding. You can also use pre-built templates to speed up the form creation process.

Fluent Forms comes with a variety of advanced features, such as conditional logic, multi-column layouts, file uploads, payment integrations, email notifications, and more. The plugin also integrates with various third-party services, such as Zapier, Mailchimp, ActiveCampaign, and others.

Overall, Fluent Forms is a powerful and user-friendly form builder that can help you create professional-looking forms for your WordPress website without the need for coding skills.

Creating a New Form #

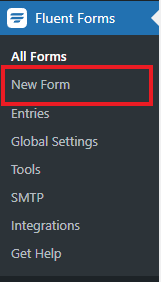
Starting from the Dashboard navigate to the side menu and select New Form from the Fluent Form Plugin options.

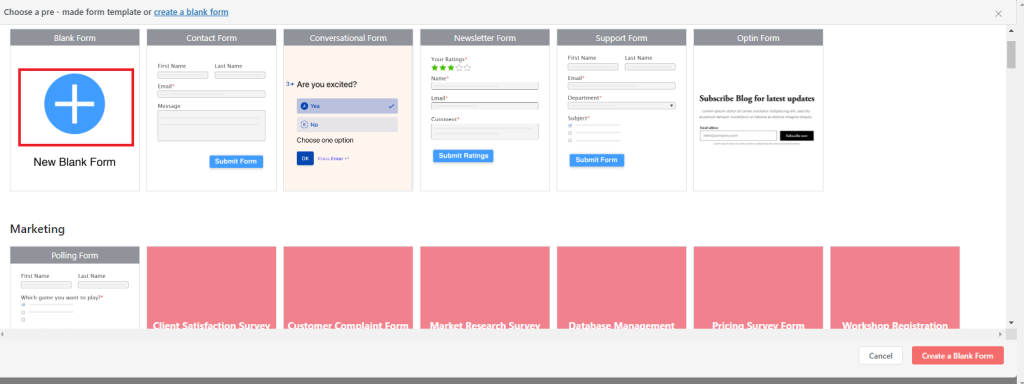
From here we have options on what kind of Form we would like to create. You can choose between creating a Blank Form, where you are in charge of everything, or from one of the premade Form Templates provided. For this example we will be picking New Blank Form.

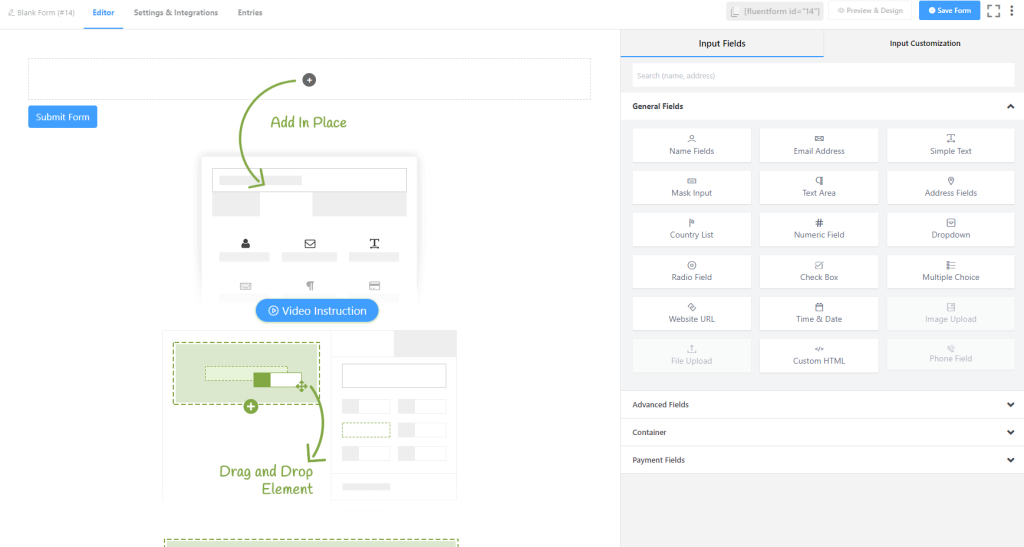
The Editor is where all the magic happens. This is where we can name our Form, add fields and design the layout. The free version of the plugin comes with Input Fields that will please the majority of users. For more Advanced Fields there is a Pro version available that will unlock these features.

You can change the name of the Form at the top of the Editor.

To start creating our new form we will start by going to the Container tab where we can design the layout of our New Form. Simply drag and drop the preferred column Containers.

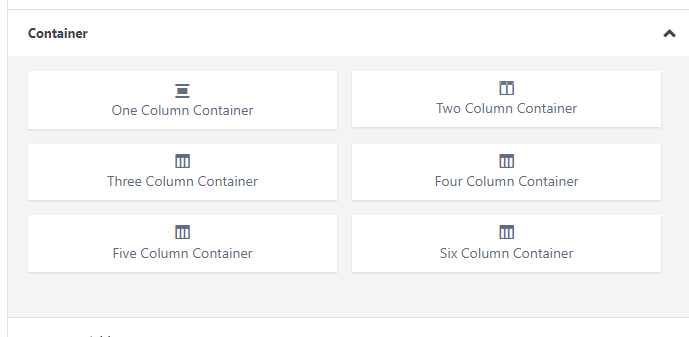
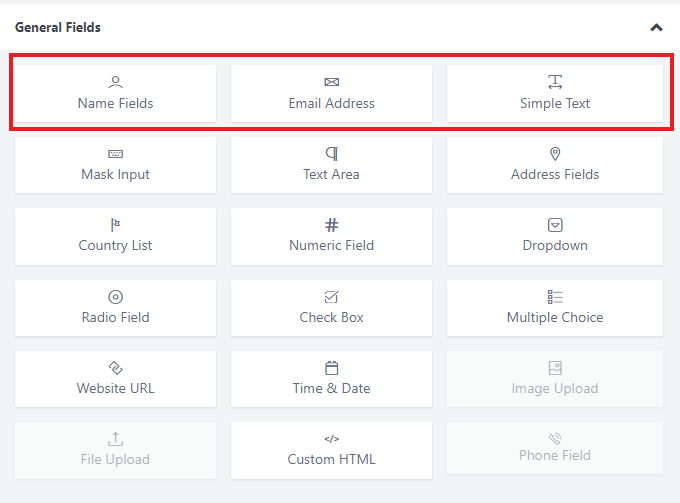
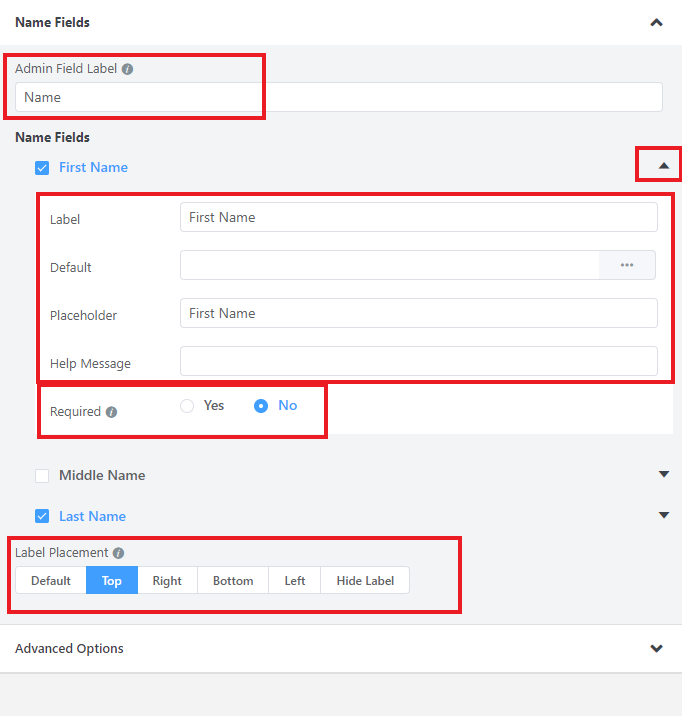
For this example we will use a very simple layout that consists of a 1 column container and a 2 column container. Once the containers are set in place we can navigate to the General Fields and drag and drop the ones we wish to use. For this example we will be using Name Fields, Email Address and Simple Text.

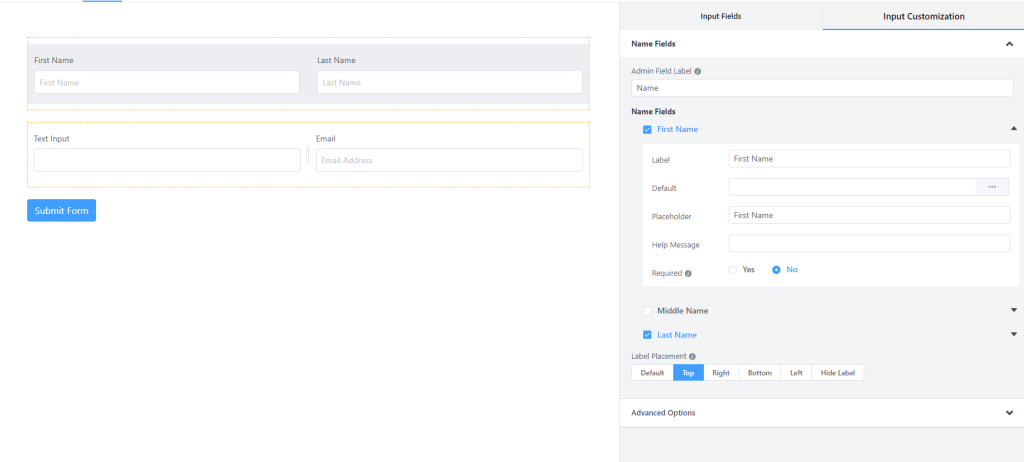
Once the selected field is in place we can then click on the field which will allow us to add customization. Each field allows you to change the name, label name, placeholder, label position as well as setting if the field is Required (Must be filled in to submit).

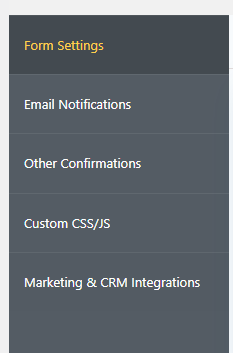
Once the form is finalized we can customize the settings by navigating to the top of the Editor Page and Selecting the Settings & Integrations tab.

There are a few things we can customize from this section such as Form Settings, Email Notifications and Custom CSS/JS.

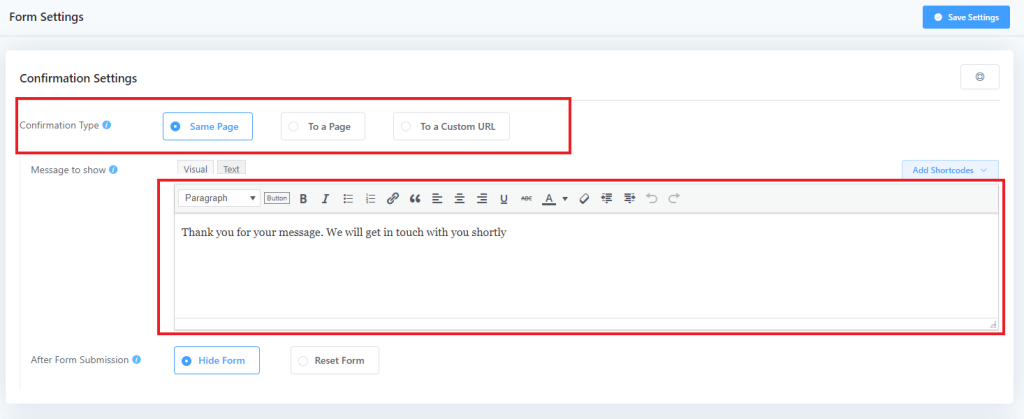
Form Settings lets us decide what happens after a user fills out and submits the Form. Confirmation Type dictates the URL the user to redirected to after they submit the Form. Same Page keeps the user on the same page the Form is on, To a Page redirects the user to another page of the website that you set and To a Custom URL redirects the user to another website that you set.

This is also the section where you can edit the message that shows to the user after they submit the form. You can edit the text in the provided text area box.

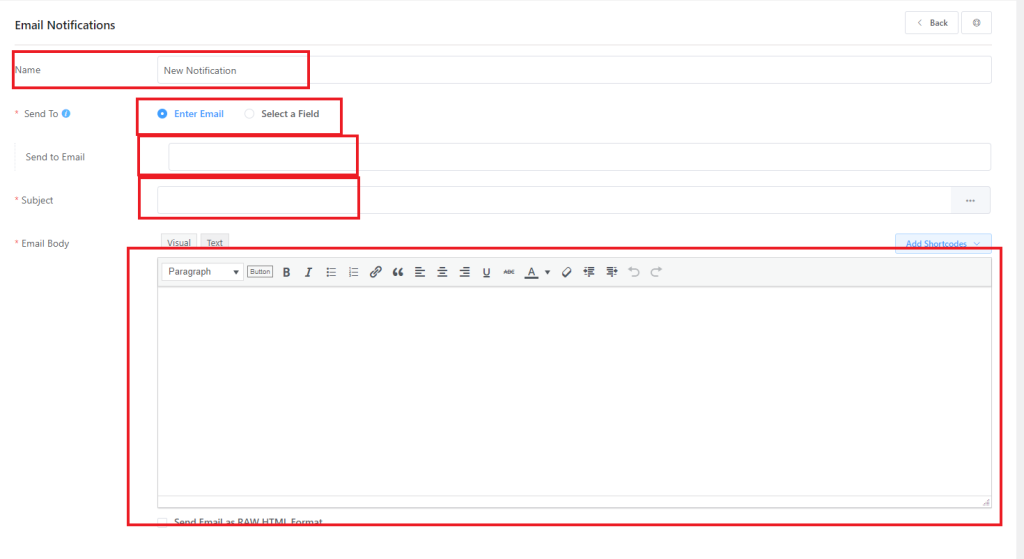
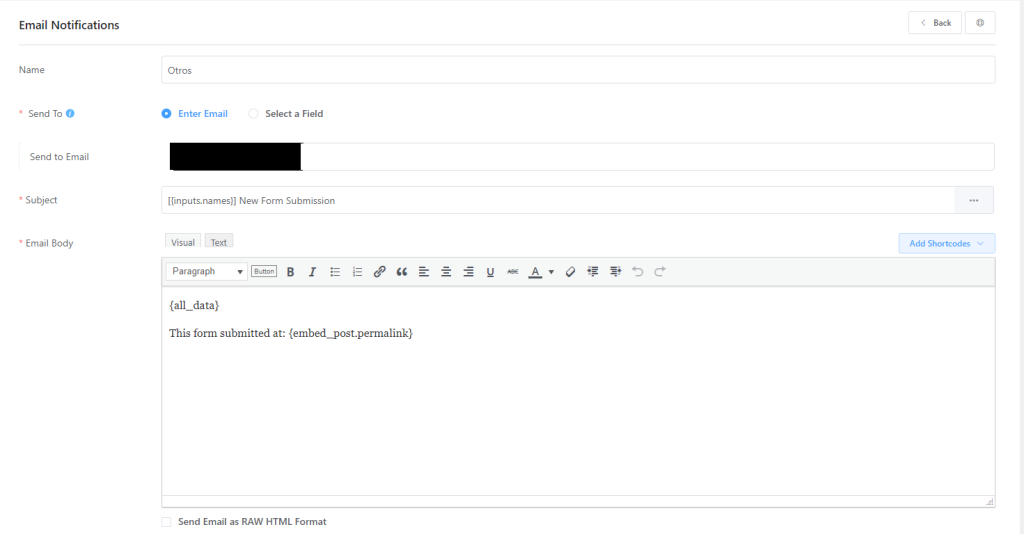
Email Notifications Section allows you to customize what email the form is sent to after being submitted as well as what info you wish to be included in the email. To start click on the Add Notification button. Please note in order for email notifications to work your server must have SMTP set up.

From this page we can Name the Notification, set up the send to email, set the Subject line and customize the email body.

Here is an example of a filled out Notification. The [{inputs.names}] parameter in the Subject Line will automatically include the Name the user inputs into the name field. This can be changed out with other parameters if the form does not include a Name Field. In the Email body the {all_data} parameter will add all form fields and data to the email body. This can also be customized to add specific fields or a custom text message.

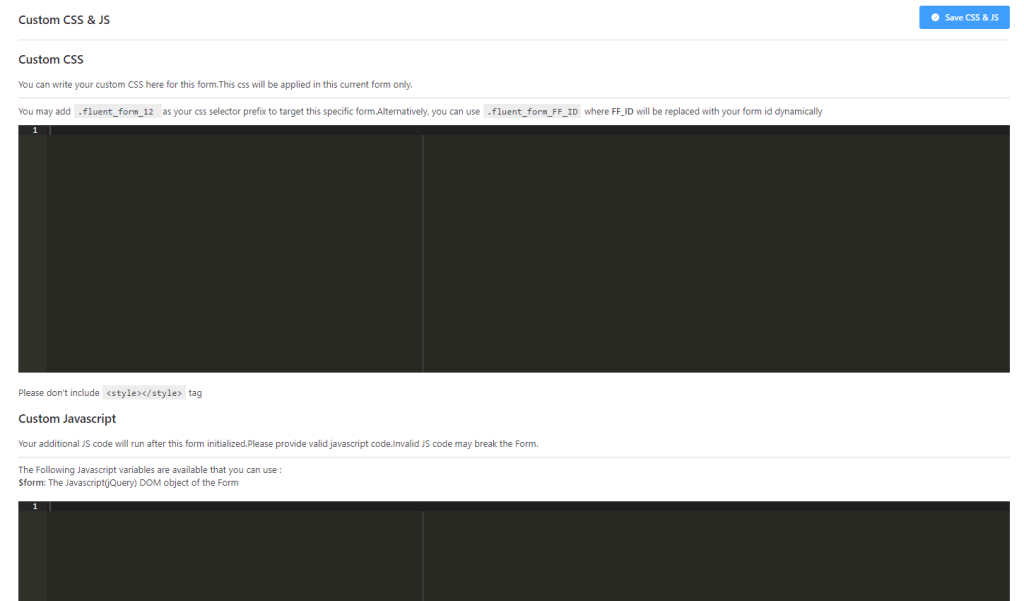
The Custom CSS/JS section allows us to add custom CSS and Javascript, if needed, to our Form. Custom CSS can also be added through the Theme’s Customization Section on WordPress as well.

Adding a Form to a WordPress Page #

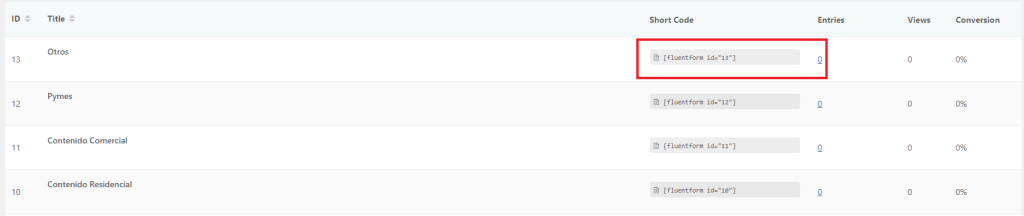
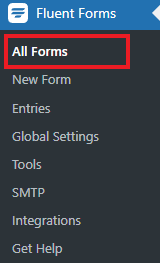
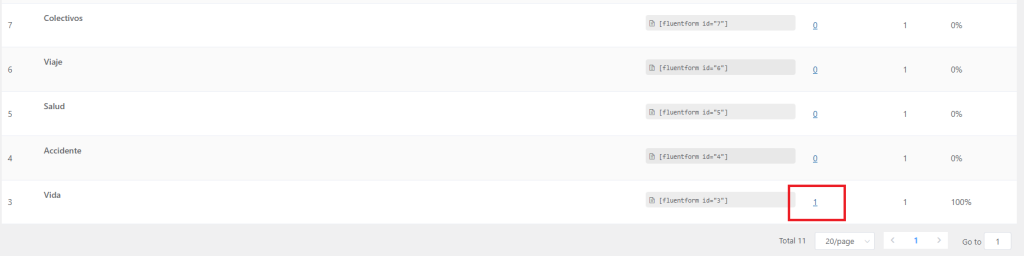
Adding a Form to the Page is very easy. Fluent Forms assigns each Form you created a Short Code which then can be used to show the Form on the desired webpage. Find the Short Code for the Form you wish to use from the All Forms Section of the Plugin.

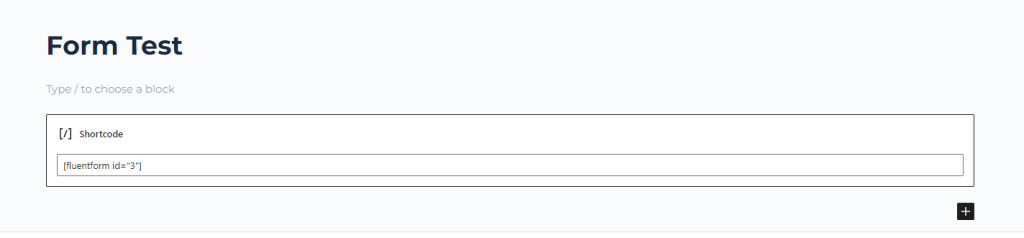
Once you have copied the Short Code navigate to the page you wish to display the form on. Create a Short Code block and paste the Short Code in the input field. Your Form will now be displayed on the page.

Entries #

The are two main areas where you can see the Entries for your forms. The first one is in the All Forms Section of the Plugin. From here you can click on individual Forms to see the Entries submitted. you have the option to view or delete each Entry.

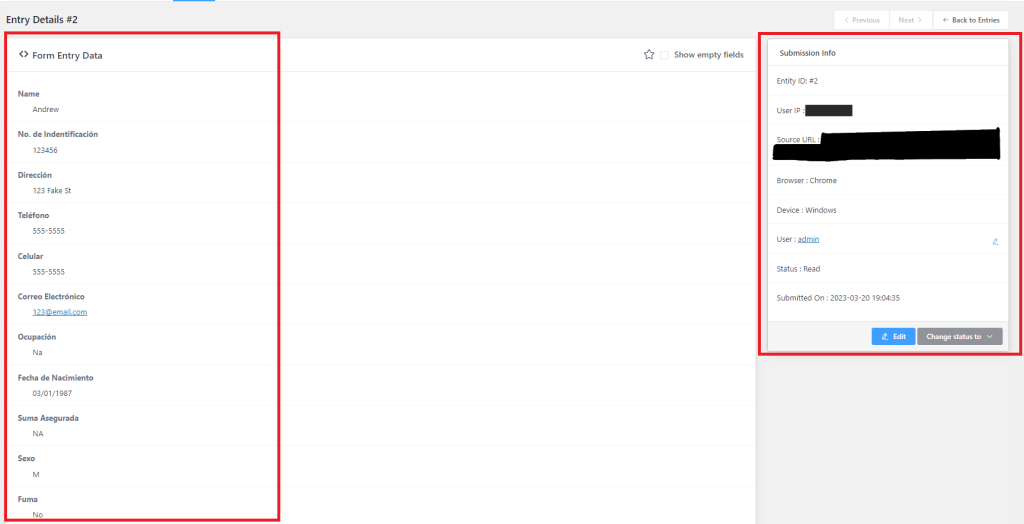
Clicking on the eye icon will display the details of the specific Entry including all form fields, User Ip, User Browser, User Device and the Date and Time the Entry was submitted.

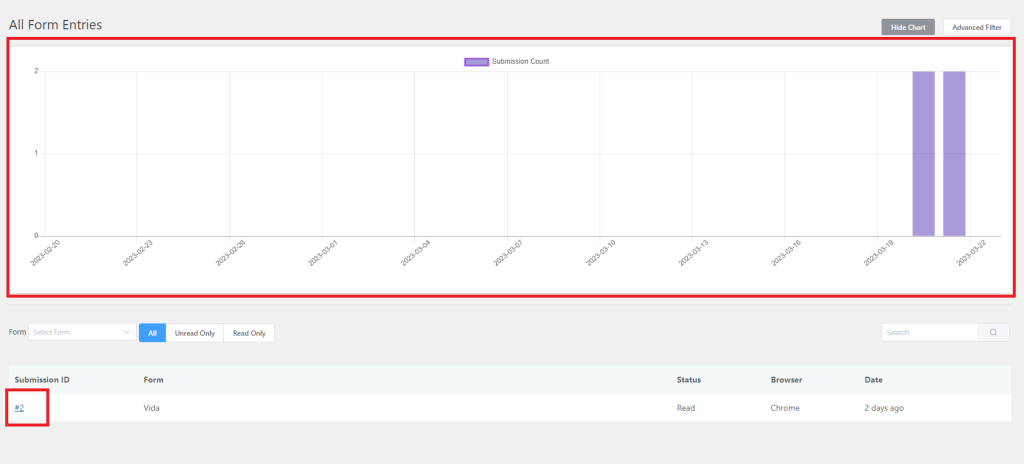
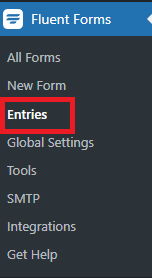
The second way to view Entries if from the Entries Section of the Plugin.

From here a bar graph is shown to easily display Submission Count per day. This method will also show All Entries whereas the other method we used is for seeing individual Form Entries. Clicking on the Submission Id will open up the more details window previously shown.

What are your Feelings
Still stuck? How can we help?

How can we help?

Updated on March 22, 2023
Perfmatters

Powered by BetterDocs

Table of Contents
  • Creating a New Form
  • Adding a Form to a WordPress Page
  • Entries

Copyright © 2022 Avetti.com Corporation.