
Overview #
Avetti Commerce supports multistore eCommerce, multiple levels of suppliers, and even multiple marketplaces in different languages.
This document has been designed to help you set up your marketplace in Avetti Commerce. This document provides all the necessary definitions to understand the different stores and roles used in a Marketplace on the Avetti Commerce solution, as well as, the steps you need to configure a marketplace, to create a supplier store and input or upload products, and then send those products to the Master Catalog, share these items to the Marketplace Preview, publish to Marketplace Shop, confirm that the items shared from the Master Catalog are available on Marketplace Shop store, place the order and verify that orders are replicated on to Supplier (shop) orders portal.
By the end of this guide, you will learn how to:
- Verify the Initial Setup
- Create a New Supplier Store.
- Create an independent checkout for the supplier store.
- Create products, prices, and inventory records
- Copy the Supplier Item to the Master Catalog Warehouse
- Share the item from the Master Catalog Warehouse to Marketplace
- Change the Shipped Status of an item in the order on the Supplier Shop Ordering portal for the Supplier of that item.
- Confirm the Shopper receives an email with updated order status
Suppliers can upload or manually create and manage their products via the Supplier Portal react administration pages.
This guide is intended for all admins.
Introduction and Basic Concepts #
Types of Stores #
It is important to differentiate the various type of stores and roles used among the Avetti Commerce marketplace platform, in order to identify which store to use and how to use it.
| Store Type | Definition | Role | Availability Level |
| Wholesaler stores | A wholesaler store will be used to create products and supply them to retail stores with product lines, price factors, and Imap. | Wholesaler Admin | Enterprise eCommerce / Marketplace Customers ONLY |
| Supplier/Retailers stores | The supplier store is where the vendor will create, edit, and remove their product, as well as update prices and inventory. The vendor will have the ability to manage orders from this store and approve or reject orders. In this store, the vendor will also manage the information about the store by editing the About me page in the react admin panel OR editing the store item. The store item is usually automatically generated when a new supplier store is created but it can also be added to the supplier store by going to Catalog > Stores in the sys admin pages. The store item will contain item properties such as store address, email address, telephone number, shipping methods, and store logo. It will represent the store in the front end. The store item needs to have a price greater than 0 and it does not need to have inventory. |
Supplier Catalog Admin | SME, Agency Multi-Store and Enterprise eCommerce / Marketplace Customers |
| Master Catalog Warehouse (MCW) | The MCW is used to store all the data from every supplier and wholesaler in one place. The master catalog can serve all marketplace stores so it enables centralized control over all stores and any changes that need to be made to the catalog before moving it to the live site can be approved here. The MCW will store the product information, including prices and inventory of all the supplier’s stores enabled as distributors of that MCW. NOTE: Do not update product information directly in the MCW, if you do so, the changes will be lost when the product is copied from the supplier to the MCW again. The MCW admin is the one responsible of creating new supplier stores and assigning them to the correct marketplace stores. |
MCW admin | SME, Agency Multi-Store and Enterprise eCommerce / Marketplace Customers |
| Supplier Marketplace / Sale Channel for Independed checkout | The supplier marketplace is used to allow the main marketplaces to have a different checkout process per supplier with their own payment methods. In the supplier marketplace, we only need the product prices to be available, that’s why the supplier stores need to be enabled suppliers in the MCW and in the Supplier Marketplace in order for the product’s prices to be copied. The product information and inventory are not copied to the marketplaces. In this store the basket and place order template can be modified accordingly, as well as, the advanced messages to display in the place order email. Store preferences, email settings, and advanced site admin preferences need to be updated per supplier marketplace as well to have the checkout process ready. |
Marketplace Admin | SME, Agency Multi-Store and Enterprise eCommerce / Marketplace Customers |
| Main Marketplace | The main marketplace will be the main storefront and it is used to define the group of suppliers that will be selling in the marketplace. | Marketplace Admin | SME, Agency Multi-Store and Enterprise eCommerce / Marketplace Customers |
After defining the Store Type, please refer to the following diagram, which illustrates the possible combinations between suppliers and marketplaces and their connection to the MCW:

Case 1: Suppliers A, B, and C are suppliers of the Main Marketplace 1, and each one of them has its own supplier marketplace store with different checkout processes, payment methods, shipping rates, and pickup locations.
Case 2: Supplier C is also a supplier distributing products to the Main Marketplace 2 but it has a second supplier marketplace store using a different checkout process than the one in supplier marketplace C-1.
Case 3: Supplier D also supplies products to the Main Marketplace 2, but this supplier does not have a different checkout process. It uses the Main Marketplace 2 checkout process and orders are placed on the Main Marketplace 2 directly.
Note: The SME plans supports ONLY one marketplace. In case of needing to scale to more than one marketplace, the plan needs to be adjusted to an Enterprise Plan.
Sys Admin Pages vs Standard Admin Pages #
Recently, there has been a massive shift towards the use of more sophisticated JavaScript libraries based on either React or AngularJS.
This is primarily due to the increased speed. These single-page websites load and process all the JavaScript upon first access to the site, making navigation to other pages extremely fast.
Avetti’s solutions provide two different approaches to managing supplier and marketplace stores:
- Sys Admin pages: Offers a Java-based platform that provides scalability and security. With the sys admin pages, the supplier or marketplace admin has access to our advanced functionality and more complex admin pages. They are used mainly by the sys admins, store admin, and marketplace administrators to set up stores, enable suppliers, set up promotions, and implement advanced marketing tools. The roles and menu views are different than the React admin administrators.
- Standard Admin pages: Offers React-based administration pages communicate via GraphQL to our Java-based back end. This approach not only provides flexibility to brand the admin pages, but also provides your team and your suppliers with GraphQL APIs to access orders, inventory, and prices, and to update their catalog data. We call these admin pages the simplified version of the sys admin pages and it is mainly used by the suppliers and MCW admins to do simple tasks like creating products, adding inventory, and report checking. The roles and menu views are different than the Sys Admin pages
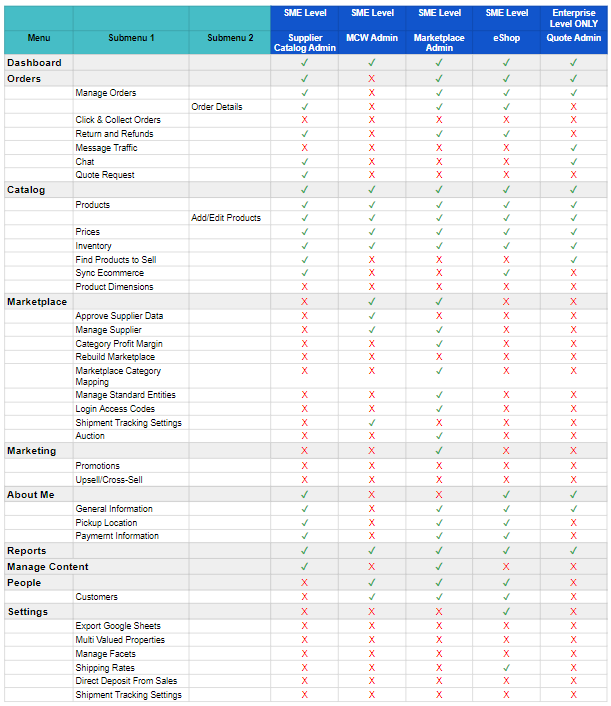
Roles and Permissions – React admin #
Now that we know the purpose of each store in the marketplace, we need to identify the roles and permission to access different functionality and views on the React Admin Pages.
On a store with multiple logins and types of stores, separating what admin users can manage and the privileges admins have is required. The roles are set by the system administrator when creating a new user which makes each role have different menus and permissions.
Currently, we have 4 different predefined roles:
- Supplier Catalog Admin
- MCW Admin
- Marketplace Admin
- Quote Admin
Refer to the following table for information on the access and menu view to the admin pages each role has in the marketplace:
Preview and Shop Instances #
Every store in the server has a Preview and Live/Shop instance. Preview is the instance where most of the work is done. Testing can be done here without affecting your Live instance or your customers’ experience.
The Live instance is what your customers will actually see and use. Preview and Live instances only match after a Publish has been made from preview, as a Publish essentially copies the Preview instance onto Live. Even so, there are a number of features that are not impacted by Publish and must be set manually on the Live instance, such as Inventory, Payment Gateways, and Store Properties among others.
It’s easy to distinguish the two by viewing the URL in your address bar. The URLs may look like the following:
Preview: www.yourdomain.com/preview/login.admin
Live: www.yourdomain.com/login.admin
This will show the admin page on either instance. Notice that to log into either of these instances as an administrator, simply add /login.admin to either.
Remember, changes made to Live do not affect Preview; also, changes made to Preview only affect Live after a Publish has been completed!
NOTE: Real orders and customer data are stored ONLY on the Shop instance. Real data must never be stored in the Preview instance.
Step 1: Initial Setup #
Prerequisites: #
- Access to a Your Customized Server
- Access to the Sys Administration pages.
- User Credentials to the System admin role.
Stores in the Demo Server #
If you have received access to your Server, the following will be set up for you as initial stores on that server. You can confirm that by seeing what stores or portals exist on the List of Vendor admin page after you log in as a system administrator. Let’s start by checking the Preview instance and verifying the following stores have already been created:
- A Supplier store on Preview and shop
- A Master Catalog store on Preview and Shop
- A Marketplace Preview and Shop. Note: Shop instances can be created by simply publishing the stores from Preview.
To do so, follow these steps:
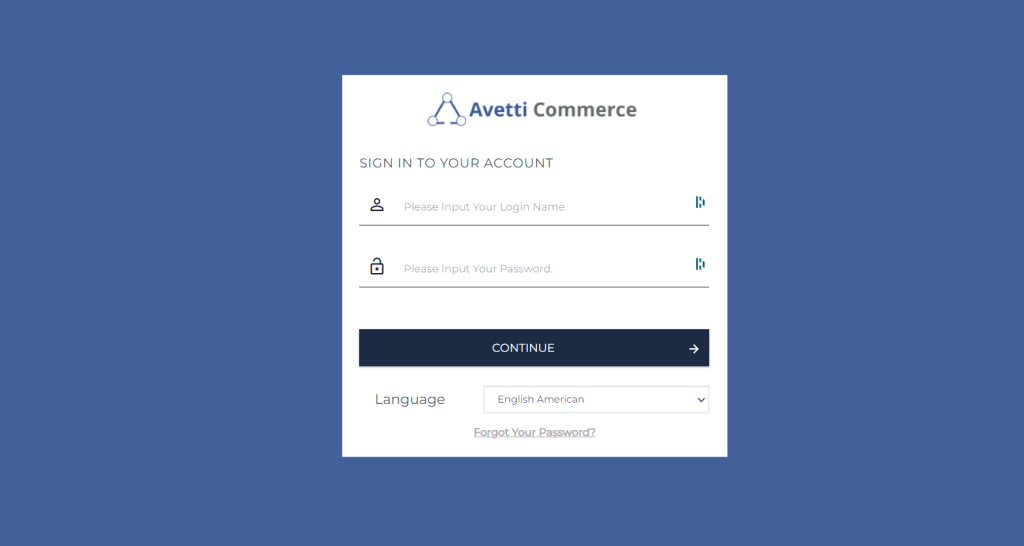
1. Go to the preview instance of your server’s URL.
The URLs may look like the following:
Preview: www.yourdomain.com/preview/login.admin
2. Use your System Admin credentials to enter the Login Name and Password.
3. After logging in, you will be redirected to the List of Vendors admin page.
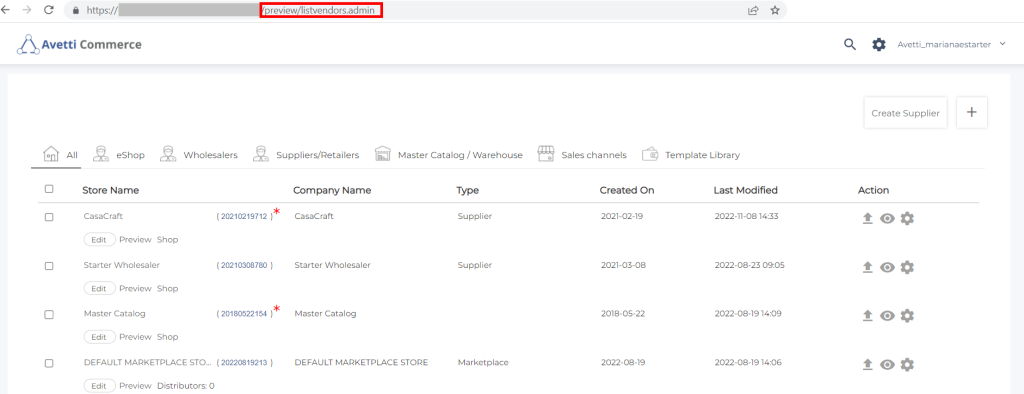
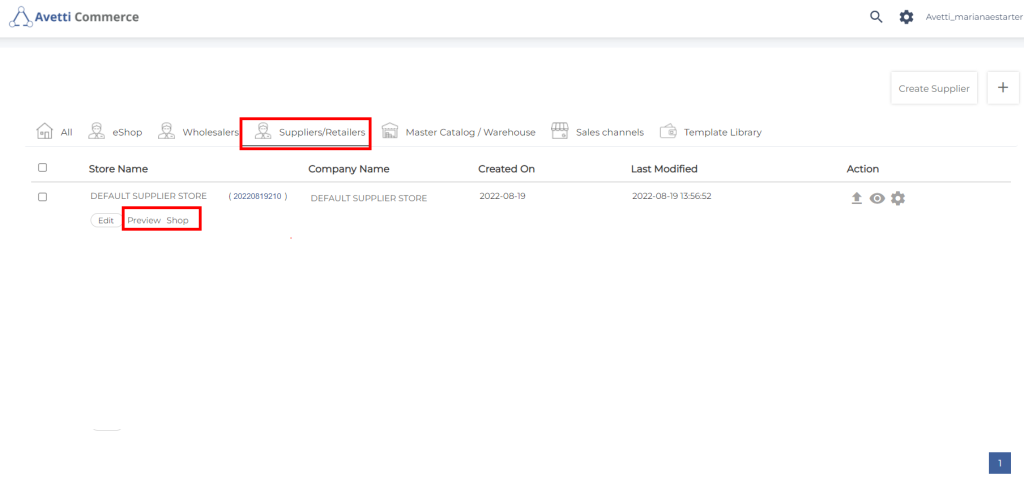
4. Verify there is a Supplier store, by clicking on the ‘Supplier/Retailers’ tab.
- The list of available Suppliers will be displayed under this tab.
- Check if the store has been published to the Shop instance by verifying there is a Preview and Shop link beside the Edit button.
- If only the Preview link is available, it means the store has not yet been published. This will automatically change when the store is published.
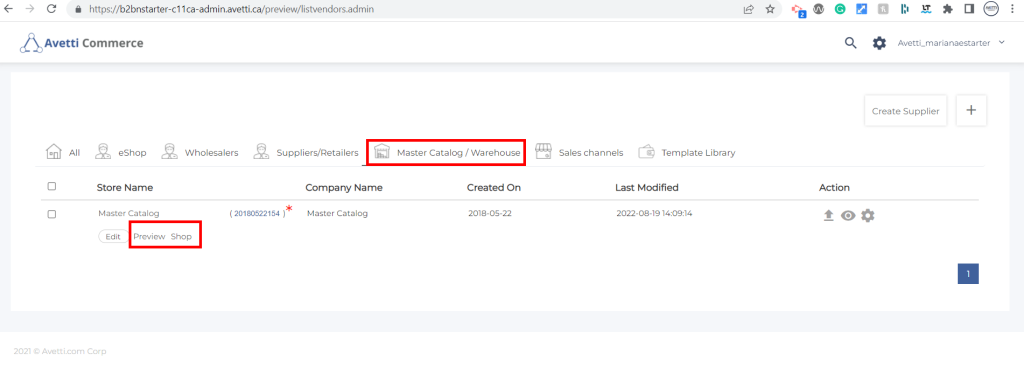
5. Verify there is a Master Catalog store, by clicking on the ‘Master Catalog / Warehouse’ tab.
- The list of available MCW stores will be displayed under this tab.
- Check if the store has been published to the Shop instance by verifying there is a Preview and Shop link beside the Edit button.
- If only the Preview link is available, it means the store has not yet been published. This will automatically change when the store is published.
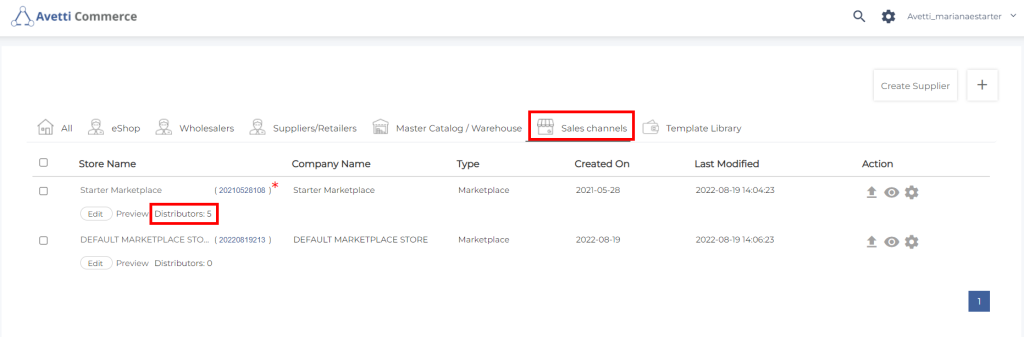
6. Verify there is a Marketplace store, by clicking on the ‘Sales Channels’ tab.
- The list of available Marketplace stores will be displayed under this tab.
- Check if the store has been published to the Shop instance by verifying there is a Preview and Shop link beside the Edit button.
- If only the Preview link is available, it means the store has not yet been published. This will automatically change when the store is published.
- In this type of store, we will also show a Distributor section to inform the number of suppliers enabled on that Marketplace.
Now that we have the stores, we need the following users with specific roles, which will be provided by the system administrator:
- A Supplier catalog admin with access to the Supplier store on preview-This admin creates/modifies items on the supplier (preview) store
- A Supplier warehouse admin with access to the Supplier store on shop-This is a separate admin account on shop to manage Order item status.
- A System admin account on the preview server to copy items to Master Catalog/ warehouse. This account also lets you create stores and other admin accounts.
- A System Admin account for the shop server to login and view orders on shop and access the shopper pages
If your account has permission for creating new users or viewing existing users, you can do so by going to the List of Vendors admin page and clicking on the Gear located in the header’s right corner.
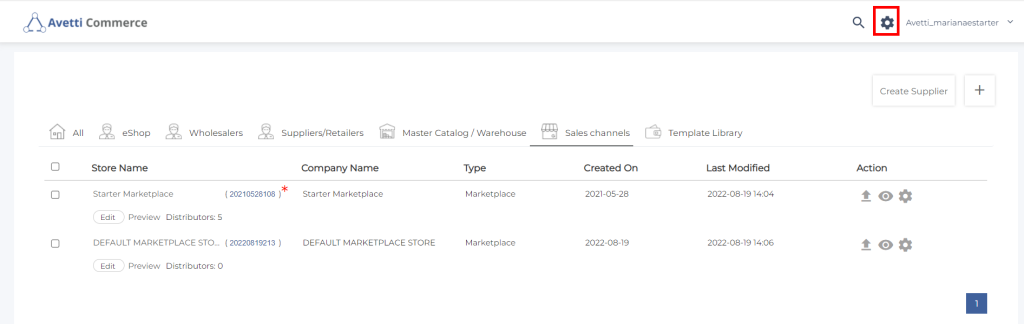
And then click on Admin Users
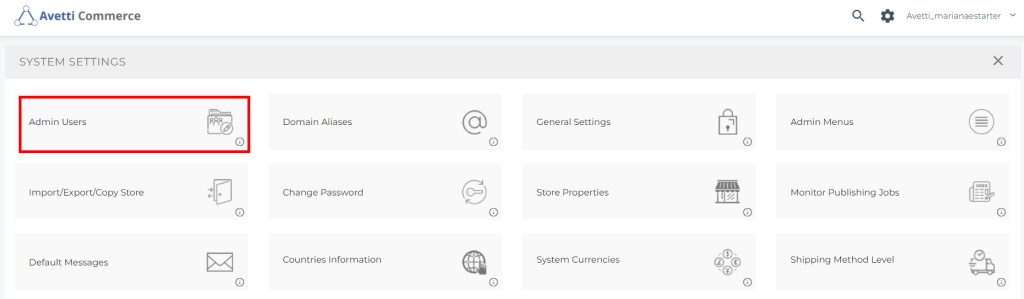
A list of all the admin users will be displayed on the Admin Users admin page.
Step 2: Create a Supplier store and account #
A Supplier Catalog admin uploads products into a Supplier preview store. The products from this supplier store then replicate to a master catalog when the products change the status to Complete on the Supplier store.
To create a Supplier store, follow this document:
Create Supplier store
Step 3: Create an independent checkout for the supplier store. #
What is an independent checkout? In a marketplace, each supplier may decide to have a different checkout process than the main marketplace store. This means that the supplier will have different payment methods, shipping, and pickup rates, and promotions separated from the main marketplace store. This is defined as an independent/separate checkout, and a ‘supplier marketplace’ store must be created to enable it. When an independent checkout is used when the customer adds products to the cart, the products will be automatically separated from the main marketplace checkout and grouped into the supplier checkout. This allows the customer to place separate orders for different suppliers in one marketplace.
In this type of store the basket and place order template can be modified accordingly, as well as, the advanced messages to display in the place order email. Store preferences, email settings, and advanced site admin preferences need to be updated per supplier marketplace as well to have the checkout process ready for each supplier.
In the supplier marketplace, we only need the product prices to be available, that’s why the supplier stores need to be enabled in the MCW and in the Supplier Marketplace in order for the product’s prices to be copied. The product information and inventory are not copied to the supplier marketplaces.
To create a Supplier Marketplace store, follow this document: Create Supplier Marketplace store
Use the following details to verify the supplier marketplace store is correctly set up:
Prerequisites: #
- Access to the sys admin pages (java admin)
- Log in as a sys admin
- Access the Getting Starter guide to check the definitions of each type of store.
To validate the supplier marketplace configuration, follow the same steps:
1. Store Type #
Go to the Store Setting pop-up, located on the List Vendors page > Supplier store row > Gear > Store Settings > Store Type tab.
Note: The List Vendors page is the first page displayed after the admin logs in.

- Make sure the ‘Marketplace’ radio button is checked
- Choose the MCW store vid from the ‘Warehouse’ dropdown menu.

Click on Update.
2. Store Settings #
Go to the Store Setting pop-up, located on the List Vendors page > Supplier store row > Gear > Store Settings > Company and Contact Info tab.
- Make sure the Primary Domain is correct and it is the same as the main marketplace store.

3. Verify the Store Item Properties #
Go to the default supplier row in the List of the Vendors admin page and click on the supplier VID
Now go to Settings >Store Properties
The Store Properties table admin page will open on the same page.
Verify these properties are setup correctly:
| Property | Value |
| is_main_marketplace | FALSE |
| Is_Supplier_Marketplace | TRUE |
| Auto_Replicate_Order_To_Supplier | TRUE |
| Enable_Sharing_Customer | TRUE |
| Main_Marketplace_Store_Id | {MCW store} |
| SHARE_FROM_MCW | {MCW store} |
| TEMPLATELIBRARYVID | {Marketplace Library VID} |
| TWITTER.EnableLogin | No |
| FACEBOOK.EnableLogin | No |
| AUTO_VENDOR_PUBLISH_DELAYED_MINUTE | 2 |
| AUTO_VENDOR_PUBLISH_ENABLED | TRUE |
| GoogleMapApiKey | {Google key} |
| Google_SSO_Client_ID | {Google Client ID} |
| DefaultCategoryImagePath | /20180522154/assets/category/images/ |
| DefaultCategoryThumbnailImagePath | /20180522154/assets/category/thumbnails/ |
| DefaultItemImagePath | /20180522154/assets/items/images/ |
| DefaultItemLargeImagePath | /20180522154/assets/items/largeimages/ |
| DefaultItemSmallImagePath | /20180522154/assets/items/small/ |
| DefaultItemThumbnailImagePath | /20180522154/assets/items/thumbnails/ |
Step 4: Create Products, Price, and Inventory Records #
Prerequisites: #
- Access to the React Admin Pages
- Log in as a Supplier admin (User Credentials to the Supplier Catalog admin role.)
- Access the Getting Starter guide to check the definitions of each type of store.
Login to one of the supplier stores (on preview) with a supplier admin account. A supplier role is different from a site admin role in a way that store permissions are limited to creating/ modifying items, price records, inventory records, publishing, and so forth.
Create a Product #
The first step is to create a product on the supplier store (preview). The Manage Items (Catalog | Products) section is the page for adding products and product details to the store. Click the Add button to create a new product in the store catalog.
Following this guide to create a new product: Create Product
If you need to create products with variations, follow this guide: Create a product with Variations
Step 5: Copy the supplier products to the Master Catalog Warehouse (MCW). #
After the products have been created, the initial status of the products is set to ‘Draft‘ or ‘New Products‘.
The Product Status defines the condition the product is in, this helps organize each product according to its status. The products in the supplier store could have a different status, which will determine the visibility of products on preview and shop instances.
Currently, the following statuses are used on the supplier store:
- New Products/Draft: When the product is created, the New status is added by default if no other status is defined. The product with this status can be seen only in the Preview instance and only on the supplier store.
- Complete/Published: This status code is the most important one, and it can be used when the product’s data (such as the descriptions and variations) have been approved by the supplier. When the product is set to Complete, the product information such as price, inventory, images, description, SEO URL, and variations, among others, will be supplied and sent to the MCW store. Only after the product is set to Complete on the
supplier store, it will be available on the MCW so then the MCW will share the products with the Marketplace store. Note: Keep in mind it takes 5 minutes for the products to be copied to the MCW after they are ser to Complete. - Validation Errors Found: This status code is used to automatically flag an item if there are any errors when they are copied to the MCW. The errors can consist of missing titles, descriptions, images, page titles, or prices set to 0. It is recommended that each item is validated at least once before setting it to Complete/Published. You can change the product to this status to review later as well.
- Remove from Marketplace: Use this status to remove the products from the MCW store and the Marketplace store. When the product changes to this status, the price and inventory records for that product will be removed from the MCW and the Marketplace store. This will hide the product from the Marketplace and the customers will not see it in the store. To delete the product completely from the supplier store, it needs to be set to Remove from Marketplace and then deleted from the Manage Products page.
Step 5: Publish the stores after the supplier products have been set to Complete #
After the products have been created and set to Complete to copy them to the MCW and Marketplace stores, it is critical to Publish the following stores in order for the products to be available on the live site. The products won’t be visible to the customer if the stores are not published.
- Supplier store
- MCW store
- Marketplace store
- Supplier Marketplace store (if applicable)
Two types of data are published from the preview to store to the live store:
- The items data
- The static content in files that changed
Prerequisites: #
- Access to the Sys Admin Pages to go to the List of Vendors admin page
- Log in as a Sys admin or Super admin user
How to publish? #
Administrators can access the Publish to Shop feature by going to the admin menu and clicking on Catalog | Publish to Shop administration pages.
The Publish to Shop admin page will be opened in the same window showing two sections:
- The Publish task list:
This section will only be displayed if there is at least one publish task record already on the table. If there are no records, the page will be displayed as follows:
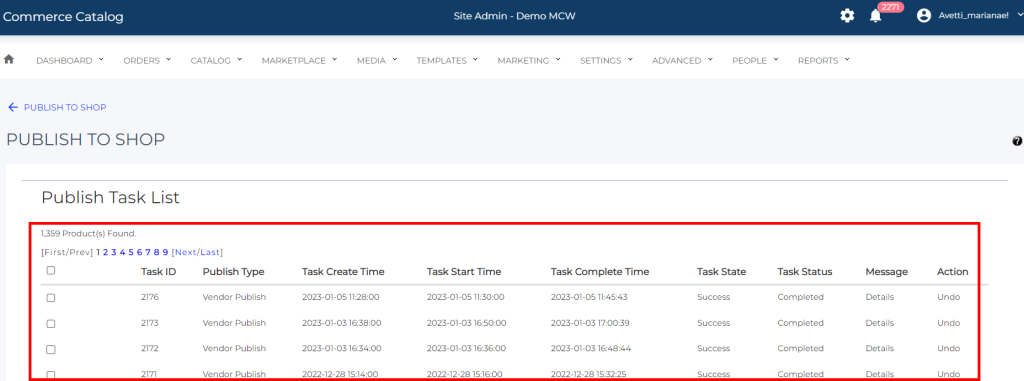
When the administrator runs the ‘Publish’ process by clicking on the ‘Publish’ button, a new record will be created, and it will be displayed on the table. Showing the time the process started, the time it was completed, the status and the details.
The status of the record will be automatically updated or it can also be refreshed by clicking on the ‘Status’ button.
The records can be deleted from the table, by selecting the record and clicking on the ‘Delete’ button.
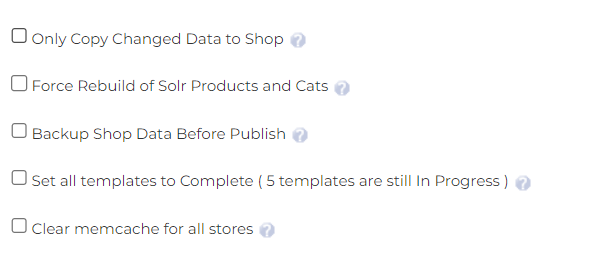
- The Publish options
There are four options of publishing, allowing you to choose how much data to publish.
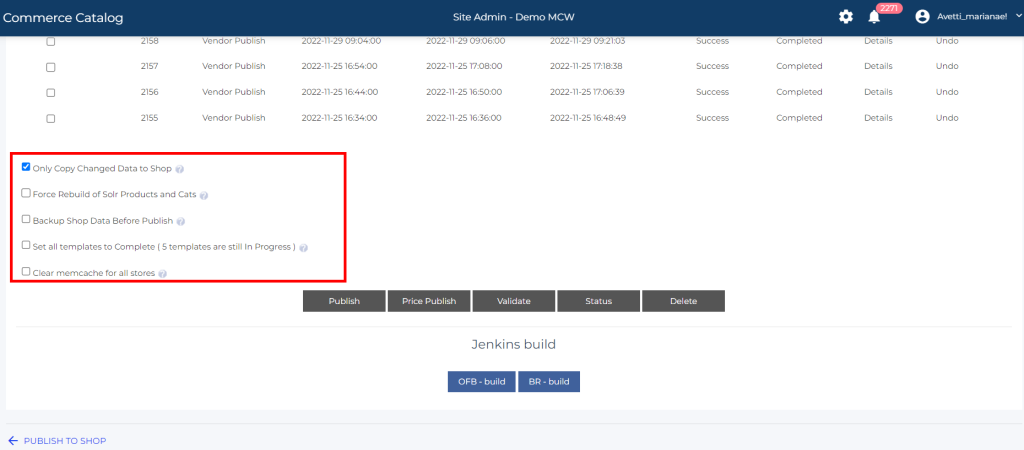
Only Copy Changed Data to Shop: Use this option to copy to the live store only the data that has been modified or added to the preview store after the last publish to live. Including items, categories and templates and excluding the inventory. This data will be added to the live store.
Force Rebuild of Solr Items and Cats: This setting is used to rebuild category and Item information in SHOP solr server. This setting should be almost always enabled since preview and shop instances use separate solr.
Backup Shop Data before publish: Creates a backup of all the data from the live store before publishing the changes of the previous store to the live store.
Set all templates to complete: Only the templates with a ‘Complete’ status can be published to the live store. Some templates could be editable or incomplete and set as ‘In Progress’. This prevents the editable template from being published to the live store. Use this feature to change the status of all the ‘In progress’ templates to ‘Complete’ and to publish the templates.
Note: If no option is checked, all the data will be added to the store doing a Full Publish
Example:
After selecting from the above options, you can click the Publish button and the following message will be displayed “Your store is now in the queue to be published. It should be updated in 10 or 20 minutes”
After or in between, you can check the status of the process by clicking the ‘Status’ button to refresh the page.