Avetti Supplier Connect is a helpful tool for Shopify store owners who want to boost their sales by adding multiple vendors to their platform. It simplifies the process of managing suppliers and allows merchants to offer a wider variety of products to their customers.
With Supplier Connect, you can automate the entire ordering process. By clicking a button in your Shopify store, the tool notifies the supplier about the received order. This eliminates the need for manual communication of order details and shipping addresses, reducing the chances of errors. The supplier can then fulfill the order and ship the product directly to the customer. This not only saves time but also improves accuracy.
Connect the Shopify reseller to the Avetti Supplier #
In order to connect your Shopify website to Avetti Supplier Connect, we will need the following information:
- Shop URL
- Admin API Access Token
- Collection Name (optional)
Shop URL #
In this section, just copy and paste the URL to your Shopify Website. For Example https://www.yourstore.com/
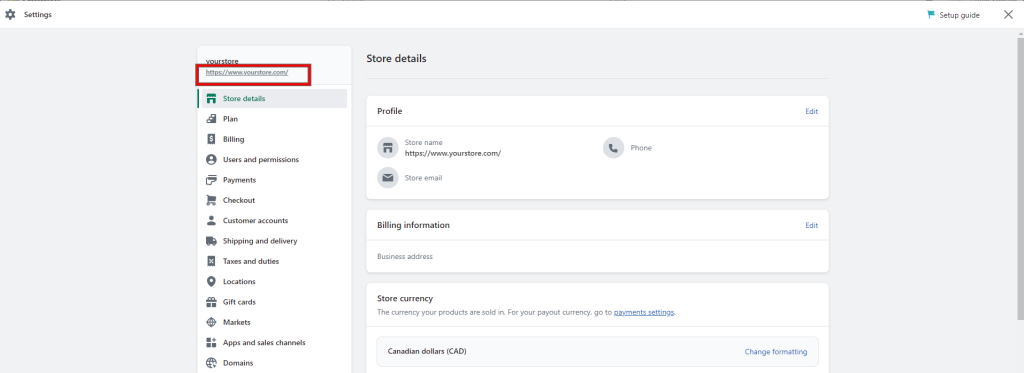
If you are unsure of the Shop URL, you can go to your Shopify account, then click on Settings.
The Settings Window will open, and the Shop URL will be located in the top left corner:
Admin API Access Token #
Step 1: To find the API Access Token, you need access to your Shopify admin panel. Located under Settings > Apps and sales channels > Develop Apps > Create an App. A pop-up window will open on the same page:
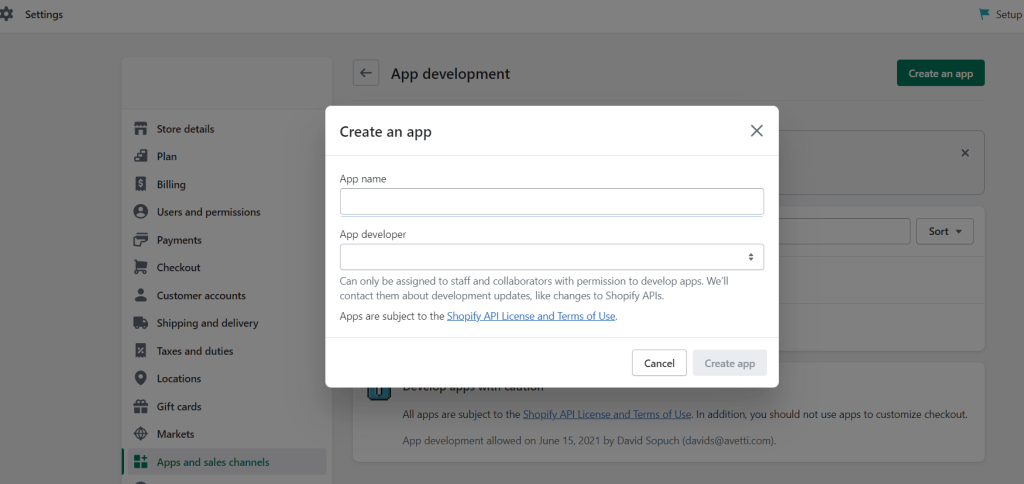
Step 2: Fill out the Create app form and click on Create app. The App development page will open:
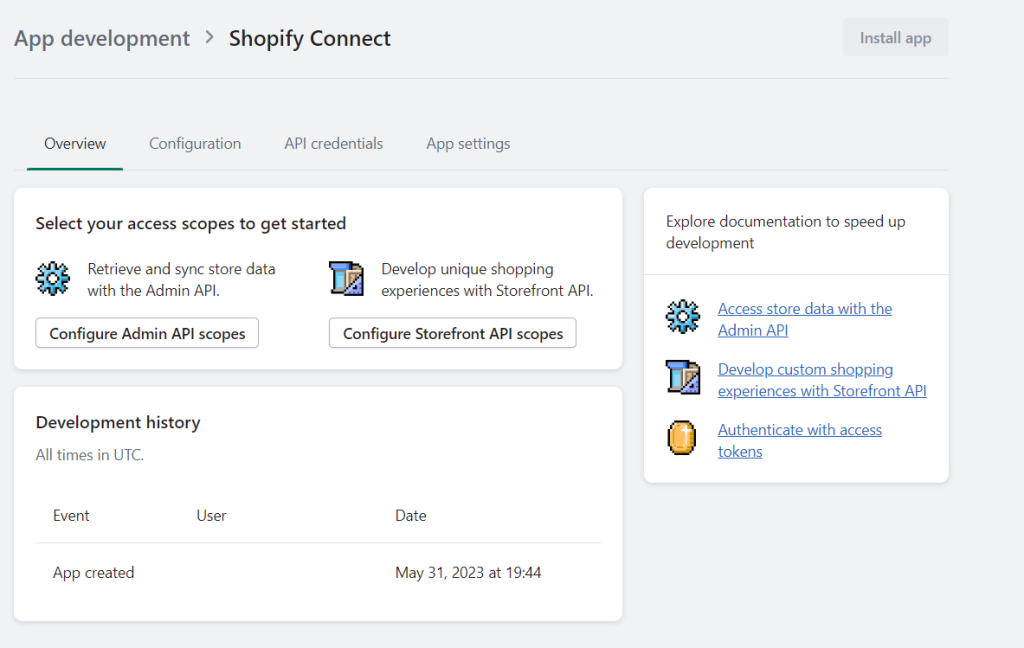
Step 3: Specify the admin API integration scopes by clicking on the Configuration tab > Admin API integration > Configure
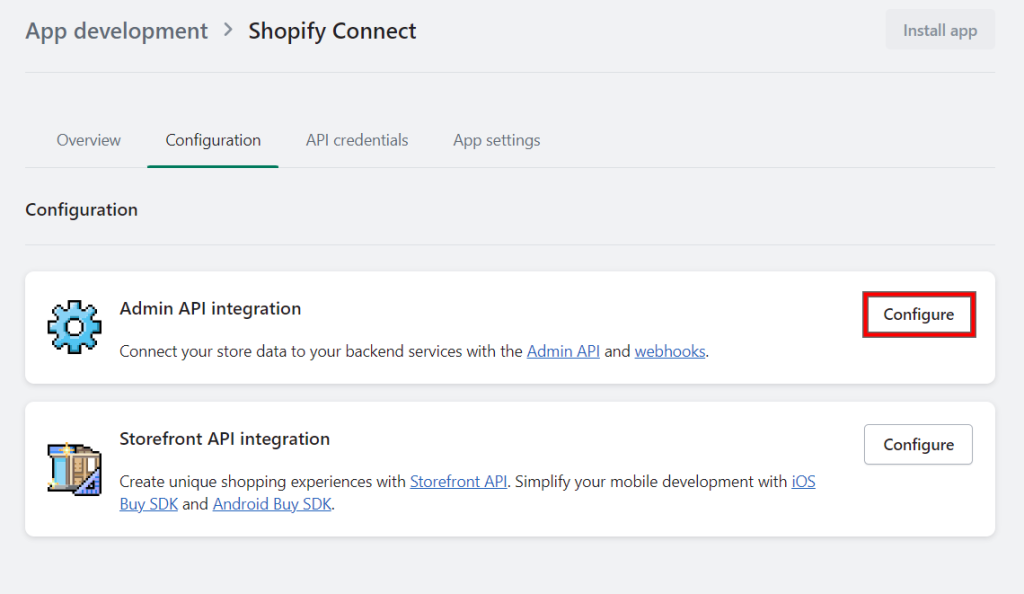
On the Admin API access scopes, enable the following scopes:
write_assigned_fulfillment_orders
read_assigned_fulfillment_orders

write_customers
read_customers

write_discounts
read_discounts

write_fulfillments
read_fulfillments

write_inventory
read_inventory

read_locations

write_merchant_managed_fulfillment_orders
read_merchant_managed_fulfillment_orders

write_order_edits
read_order_edits

write_product_listings
read_product_listings

write_products
read_products

write_shipping
read_shipping

write_third_party_fulfillment_orders
read_third_party_fulfillment_orders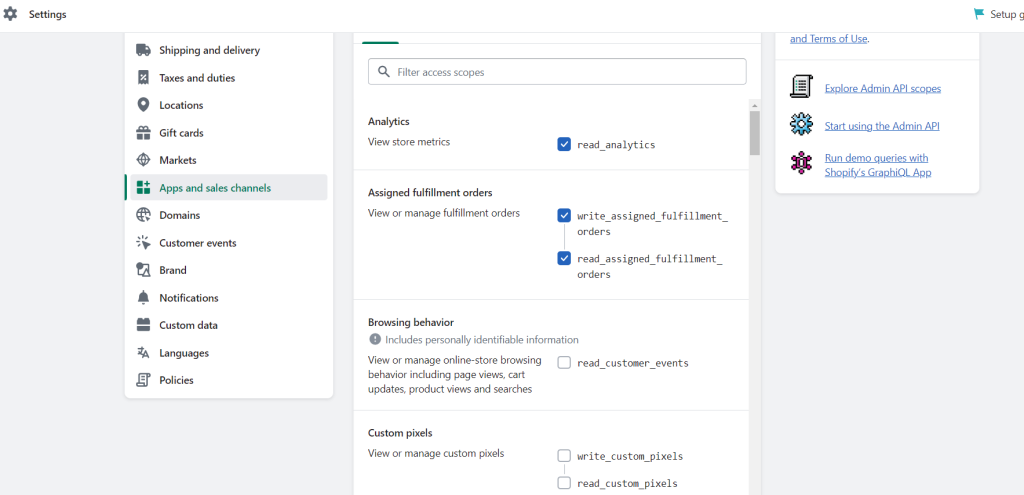
Once the required access scopes are enabled, click on Save.
Step 5: Go to the API integration tab and click on the API access tokens button. The Admin API access token section will be displayed, showing your new API token.
Click on the reveal token link, which can be done only once because of security purposes
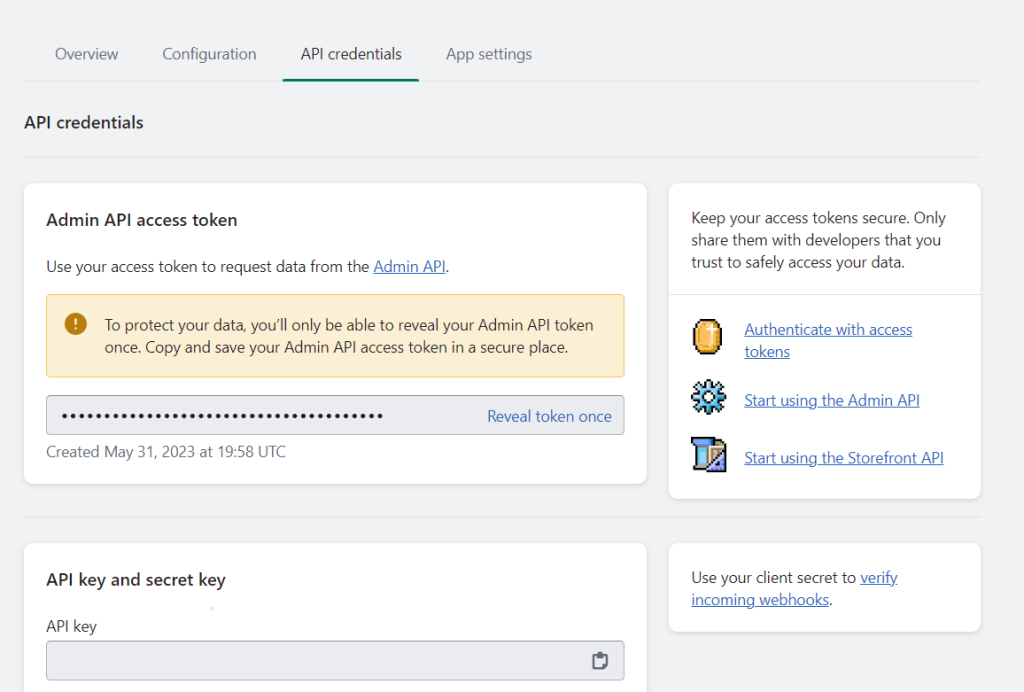
Copy the token and paste it into the Avetti Shop Connect form > Admin APO Access Token.

Collection Name #
The last detail we require is the Collection Name. You have to select a particular group of items or collection of products that will be load to Avetti Shop Connect.
To view the collection on the Shopify admin panel, go to Products > Collections. From there, copy and paste the name of the collection on the Avetti Shop Connect form.

Note: The selected collection can have up to 25 products.
